Sunday, October 1, 2017

Windows Share Permissions Done Right in FreeNAS

The scenario is that you have a FreeNAS machine - for reference I am running FreeNAS-11.0-U2 - and you want to have a multi-user system where different users have different permissions to access shares over a local network. Here I will show a quick and basic setup of a new share and setting its permissions. Then I will explain two common issues that are encountered and how to resolve them:
  • Everybody can see and read the shares over the Windows network
  • I have set up the users, added them to the proper group, but they still cannot access a Dataset

To begin with, the basic steps for creating a new network share is as follows:
  1. Create and manage users and groups
  2. Create and share the Datasets

Create and Manage Users and Groups

It is probably easier to start with this. So for example we want to have 3 users, Alice, Bob and Charlie. They should all be granted access to some common shared directories and have restricted access to some other directories.
  1. Create a Group called "Shared". This group will be the owner of later directories (Datasets) accessible to all of the users.
    Creating a new group called Shared.
  2. Create the users Alice, Bob and Charlie and add them to the group Shared.
    Creating a new user and adding immediately to the Shared group
    Adding the new user Alice, at the same time assigning her to the Shared group.

Create and Share the Datasets

There are plenty of guides on this and it is not so complicated once you get the hang of it. For reference take a look at doc.freenas.org, forums.freenas.org or tekblog. Here just for the sake of introduction the basic idea.
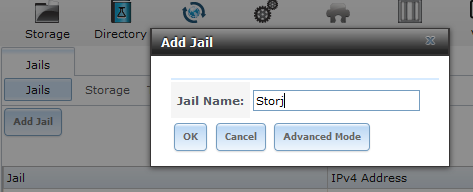
  1. Create a new Dataset called "Common" as a Windows share.
    Creating a new Dataset called Common.
  2. Change the permissions of the newly created Dataset and set the Owner (user) as root and the Owner (group) the Shared group.
    Changing the permissions of the new Datatset.
  3. Share the newly create Dataset. This makes it available over the network.
    Creating a new Windows (SMB) share
    Creating a new SMB (Windows) sahre for the newly created Dataset
 At this point all 3 users have access to the Common share over the network, by default \\freenas.local\Common. This is the basic setup and it will work on freshly created datasets. If you have previosuly changed any permissions on parent Datasets the read the section below for explaining the issues.

General Errors and Solution 

A brief section explaining some (trivial) problems I encountered and found it hard to get an explanation.

Everybody can see and read the share over the network

By default when making Windows shares in FreeNAS the group "Everyone" is added to a share and hence all users who can log in can actually view the share. The solution is to attach the volume in a Windows amchine as the owner of the dataset, right-click the folder, go to permissions and remove the group "Everybody" from the access list. This prevents LAN users from seeing the sahres all together.
Checking user and group permissions for the main Dataset
By default, the group "Everyone" is added to FreeNAS Windows shares.

Permissions settings for the main Dataset
To deny access of local network users without explicit permissions to view the shared Datasets, remove the "Everyone" group from the permissions tab.
If you have sub-folders in the datase, you will get a prompt asking you if you want to change the permissions recursively, you can say yes.

I have set up the users, added them to the proper group, but they still cannot access a Dataset

This can happen if a parent Dataset is shared and some of its sub-datasets are also shared separately. The issue comes when the sub-dataset has to be shared with an user, but the parent dataset has to be restricted. It took me a while to figure out - as it is often not mentioned - but the parent dataset in FreeNAS has to have the same Owner (group) as the sub-dataset you want to share. Lets look at the following simple share setup as an example.
Storage Dataset with Music and Series sub-datasets.
Example share setup, where Storage Dataset has 2 sub-datatsets.


If I wanted to share just the Music sub-dataset with Alice, I would need to do the following,
  • Create a new group, e.g. called "Shared"
  • Add Alice to the group Shared
  • Make "Shared" the Owner (group) of the Music dataset
  • Make "Shared" the Owner (group) of the Storage parent Dataset (this is usually forgotten!)
  • To restrict Alice's access to the Series dataset, make sure that it is owned by another group in which Alice is not a member.

Run Storjshare in a FreeNAS Jail

Not really a Debian/Ubuntu thing as per say, but since recently I built a FreeNAS system, I though it would be useful to rent out an unused 2 TB disk. So here it goes, Storjshare daemon inside a FreeNAS-11.0-U2 jail.

I am assuming that you know what storjshare is, basic experience with its terminal (non-GUI) version and that you have hands-on experince with FreeNAS.

Update (2018 Jan 9):

I ran into a range of errors during an update. Here are my observations and the solutions I found.
  1. Installing via nvm did not work for me, instead I manually installed the dependencies,
    pkg install npm
    npm install -g npm3

    Currently this would install the following node and npm versions,
    node v9.3.0
    npm3 3.10.10
    npm 5.3.0

    Since npm install the latest version of node automatically, manual installation of node is not necessary.
  2. Updating storjshare after thisworks using,
    npm3 install storjshare-daemon --global --no-optional
    (Yes, that is npm3 and not npm. I seem to have run into an infinite number of troubles with that.)
  3. Permission errors with npm can be fixed by changing npm's default directory
  4. Currently running,
    storjshare --version
    daemon: 5.3.0, core: 8.5.0, protocol: 1.2.0
If any packages are reported missing when installing storjshare-daemon via npm3, remember to install them by,
npm3 install -g <package>
instead of,
npm install -g <package>

TL;DR (aka Advanced users) 

  1. Create jail and assign storage space
  2. In jail terminal
    pkg install npm git
  3. Then install npm3 with,
    npm install -g npm3
  4. Install storjsahre via npm,
    npm3 install storjshare-daemon --global --no-optional
  5. Start the daemon and connect a farmer node
    storjshare-daemon
    storjshare start --config yourconfig.jso
    n
Not clear enough? Read below.

Create a Jail and add some space

  1. Go to Jails/Add Jail. No fancy setting required, probably name it something useful like Storjshare
    Adding a new jail in FreeNAS
    Add a new jail "Storj" where the service will run.
  2. Assign storage place to the jail. Go to Jail/Storage/Add Storage. Select the source, aka the drive or directory to store the future files and the destination. The destionation could be e.g. /mnt/Storjshare and you can ask to create the new directory.
Creating a new jail in the UI
Adding storage space to an existing jail.

Allocating storage space from a Dataset to the newly created jail
Assigning the source (drive space) of Drive1/Storjshare to the jail's /mnt/Storjshare mount point.

 The jail is ready and set, proceed to the next step.

Installing storjshare

Now I did not follow the standard instructions as installing node the described way did not seem to work. Instead I manually installed the required node version via pkg. We need the LTS version 6 of node and we can check for this. You can either log in via ssh to the jail or simply launch a terminal from the UI on the Jails tab.
UI snippet showing how to start a shell from the web browser
Conveniently launching a terminal from the UI.
Once the terminal is open, lets install the pre-requisites first, followed by storjshare.
  1. Search for availabel node versions via,
    pkg search node
    pkg search node output in the shell
    pkg search node returns a list of available packages, notice the node6-6.11.3-1.
  2. The node version we need is node6-6.11.3-1 as shown above. This can be installed with,
    pkg install node6-6.11.3-1
    Installing node6 LTS using pkg install
    Installing node6 with pkg.
  3. At the end you will be prompted to isntall npm3, so do,
    pkg install npm
    Installing npm via pkg install
    Installing npm3 after node6.
    Since npm3 can no longer be found directly through PKG, to install it do,
    npm install -g npm3
  4.  These should be completed so install the other required packages as well,
    pkg install git
  5.  Start installing storjshare as per the githug guide,
    npm3 install storjshare-daemon
    --global --no-optional
    A few warnings will be present, but for all functionality it will work.
Note: Above the --no-optional was added to the install command as a suggestion from github as the dtrace package fails to build on FreeBSD at the moment. Since the package is not necessary for storjshare, to avoid annoying - and non-relevant - error messages, this modeule can be ommited. When building without the additional --no-optional a similar error will be thrown, although storjshare would still run:
Error: Cannot find module './build/Release/DTraceProviderBindings'

Running storjshare

This is somewhat beyond the scope of the guide, however here is a quick guide on setting up a simple storjshare farming node.
  1. Create your config file with the help of storjsahre --help
    Usage: storjshare-create [options]

    generates a new share configuration

    Options:

    -h, --help                 output usage information
    --storj <addr>             specify the STORJ address (required)
    --key <privkey>            specify the private key
    --storage <path>           specify the storage path
    --size <maxsize>           specify share size (ex: 10GB, 1TB)
    --rpcport <port>           specify the rpc port number
    --rpcaddress <addr>        specify the rpc address
    --maxtunnels <tunnels>     specify the max tunnels
    --tunnelportmin <port>     specify min gateway port
    --tunnelportmax <port>     specify max gateway port
    --manualforwarding         do not use nat traversal strategies
    --logdir <path>            specify the log directory
    --noedit                   do not open generated config in editor
    -o, --outfile <writepath>  write config to path
    For example,
    storjsahre-create --key myPayoutAddress --storage /mnt/StorjShare --size 2TB --logdir /root/ -o settings.json 
  2. After the config file was created, start the daemon with,
    storjshare daemon
  3. Finally, start the farming node using the previos settings,
    storjshare start --config settings.json
     
storjshare status output from the FreeNAS jail
Storjshare inside a FreeNAS jail, runign without problems.

Note: Specifying a logfile can be necessary. During my tryouts I have encountered some trouble with the log directory not being accessible by the jail's user.

Happy farming!