
This will be a guide on how to set up a wireless access point that will forward traffic to a host/primary router (this is referred to as bridged AP) through a PPtP connection. The new AP will be created using a TP-LINK MR3020. All traffic from the second router shall go through the PPtP tunnel, while traffic coming from clients connected to the host router shall remain unaffected.
Contents
Contents
- Project Description and Aims
- Flashing OpenWRT on the MR3020
- Configuration over LuCi
- Configuration over SSH (including complete config files)
- Check Packet Route
- Troubleshooting
Project Description and Aims
 |
| TP-LINK MR |
Given is a home router with the address 192.168.1.1 that provides internet access and acts as DHCP server on the local network. The task is to set up a secondary router, a TP-LINK MR3020 (Amazon.com) with the local IP address 192.168.1.2, as a wireless access point (AP) that will bridge the connection over to the main router over the LAN port. Furthermore, all traffic from the secondary router has to go through a PPtP tunnel.
 If you need a provider that offers PPtP servers, I can recommend Privateinternetaccess where you will get a great VPN provider with PPtP service included. Perfect for both your everyday VPN needs as well as the given scenario.
If you need a provider that offers PPtP servers, I can recommend Privateinternetaccess where you will get a great VPN provider with PPtP service included. Perfect for both your everyday VPN needs as well as the given scenario.
I will assume a stock OpenWRT Chaos Calmer 15.05 on the MR3020, cleanly flashed without any modifications. Configuration is possible via ssh or over LuCi, both of which will be shown below. In older and potentially newer versions the LuCi UI may look differently.
 |
| Illustration of the sought network setup. The blue line illustrates "normal" internet traffic originating from the host router whereas the orange line shows PPtP tunnelled traffic coming from the OpenWRT router and clients connected to it. [picture source] |
Host (or primary) router
WiFi Network ==> Internet
Router 2
WiFi Network ==> PPtP enter ==> LAN interface ==> Host (primary) router ==> Internet (tunnel transmit) ==> PPtP (server) exit ==> Internet
Once OpenWRT is installed on your router, connect to it via an ethernet cable. The router should handle DHCP, meaning your ethernet port should get an IP address automatically, however if you still have your IP configured to static from flashing the router, that will work too.
WiFi Network ==> Internet
Router 2
WiFi Network ==> PPtP enter ==> LAN interface ==> Host (primary) router ==> Internet (tunnel transmit) ==> PPtP (server) exit ==> Internet
Flashing OpenWRT on the MR3020
This is covered in detail on e.g. OpenWRT wiki MR3020 page, hence I will not go through this.Once OpenWRT is installed on your router, connect to it via an ethernet cable. The router should handle DHCP, meaning your ethernet port should get an IP address automatically, however if you still have your IP configured to static from flashing the router, that will work too.
Configuration over LuCi
LuCi is technically the UI overlay of OpenWRT that can be reached via 192.168.1.1 by default on a new installation and allows easy configuration via a visual interface. Since the MR3020 has only a single LAN port, the installation is slightly different that it would be with other routers. Essentially the procedure is the following,
- Make an initial connection to the router via an ethernet cable
- Adjust the LAN interface such that it will have access to the internet through the host router
- Set up WiFi network
- Disconnect your computer from the router and connect it to the primary router
- Connect to the OpenWRT router via WiFi
- Install ppp-mod-pptp package (This provides PPtP support, which is not installed by default)
- Add vpn (PPtP) interface
- Edit again the LAN interface to bridge all 3 networks
- Set up forwarding and firewall rules
- Reboot, if necessary.
Step 1.
In your web browser navigate to 192.168.1.1 (by default) and log in using the default credentials,Username: root
Password: admin
 |
| OpenWRT LuCi login page by default under 192.168.1.1 in your web browser. |
Step 2.
Go to Network/Interfaces and click Edit for the LAN interface. This should be the only one available with the MR3020. Fill it out as shown below, according to the previously discussed network specifications.Primary router (gateway): 192.168.1.1
OpenWRT (secondary router): 192.168.1.2
IPv4 netmask: 255.255.255.0
Use custom DNS servers: 192.168.1.1
 | ||
| LAN interface General setup using a primary router with the address 192.168.1.1 and the OpenWRT router as 192.168.1.2. |
Step 3.
Go to Network/WiFi and click Edit. This section is self-explanatory and the configuration settings have no effect on the working of the bridged AP & PPtP. The only important thing here is to assign the WiFi interface to the LAN zone at the bottom of the page, as shown below. |
| WiFi interface configuration. Make sure it is added to the LAN zone. |
In the Advanced tab you can set the country where you are, which will impact on what WiFi channels you are allowed to use due to local regulations. Another thing that can be set is a Distance Optimization, which will help you adjust the signal strength based on the furthest device.
Step 4.
Save the settings and connect your OpenWRT router via an ethernet cable to one of the LAN ports (not WAN) of your primary router. Disconnect power if you have to, after saving the settings should remain stored.Step 5.
Connect to your newly created WiFi network and in your browser navigate to 192.168.1.2 where you can log in.Step 6.
Go to System/Software and click "Update". Then make a search for "pptp" and from the results install the package called ppp-mod-pptp. Refer to the picture below. (Funnily, when searching directly for ppp-mod-pptp I received no search results...) |
| Install the ppp-mod-pptp package from the results list. |
Step 7.
Go to Network/Interfaces and Add New interface for the vpn with protocol PPtP then click "Edit". |
| Create Interface. Name it e.g. vpn and select PPtP protocol. |
VPN server (IP address or domain name)
Username
Password
You should obtain this information from your service provider.
 |
| PPtP setting when adding the new VPN interface. |
Step 8.
Since a new interface was just added, the LAN interface has to be edited again to bridge 3 interfaces in total (so far it is bridging only LAN and the WiFi). Go to Network/Interfaces and edit the LAN interface. Navigate to the Physical settings tab and make sure to bridge all 3 networks available: eth0, gretap0 and the WiFi interface. The end result should look similar to the following. |
| LAN interfaces Physical settings tab. All 3 interfaces, Ethernet, Wireless and PPtP (gre0 or gretap0) must be ticket at the bridge. |
Step 9.
Navigate to Network/Firewall settings and click Add at the bottom of the page to add a new zone for the vpn. Set it up as,Input: reject
Output: accept
Forward: reject
Masquerading: Yes
Covered network: vpn (or as you called it in Step 7.)
 |
| New firewall zone settings for the vpn interface. |
 |
| Firewall Zones settings. |
Step 10.
If changes did not take immediately effect, reboot router. Make sure to save all changes first! |
| Reboot OpenWRT. |
Configuring over SSH
You will need to edit 3 files in total (assuming again a stock, unmodified OpenWRT installation) to apply all changes required. These are,
- /etc/config/network
Holding the general router interface configurations. - /etc/config/wireless
Responsible for the wireless interface, including WiFi SSID and encryption settings. - /etc/config/firewall
Responsible for assigning different interfaces into different firewall zones (applies different rules to them) and to allow traffic forwarding between interfaces.
Important: Basic vi editing skills are required, once again Here is a cheat sheet for your convenience.
- Connect to your OpenWRT router via an ethernet cable and follow the steps from a terminal window.
- telnet 192.168.1.1
- passwd
This step sets a password for your router (this will also be the password for the LuCi interface if you wish to use that later!) and also disables telnet further on and enables ssh. Use it as ssh root@192.168.1.1 from this point onwards. - vi /etc/config/network
Add changes to file from section below! - vi /etc/config/wirelessAdd changes to file from section below!
- vi /etc/config/firewallAdd changes to file from section below!
- /etc/init.d/dnsmasq disable
- reboot
- Disconnect the router from your computer and connect it to the primary router through one of its LAN (not WAN) ports.
Copy pasting the settings from below will most likely get you up and running in no time.
/etc/config/network
config interface 'loopback'
option ifname 'lo'
option proto 'static'
option ipaddr '127.0.0.1'
option netmask '255.0.0.0'
config interface 'lan'
option force_link '1'
option type 'bridge'
option proto 'static'
option netmask '255.255.255.0'
option ip6assign '60'
option ipaddr '192.168.1.2'
option gateway '192.168.1.1'
option dns '192.168.1.1'
option delegate '0'
option _orig_ifname 'eth0 wlan0'
option _orig_bridge 'true'
option ifname 'eth0 gretap0'
config interface 'vpn'
option proto 'pptp'
option server 'IP_OF_YOUR_PPTP_SERVER'
option delegate '0'
option username 'USERNAME'
option password 'PASSWORD'
/etc/config/wireless
config wifi-device 'radio0'
option type 'mac80211'
option hwmode '11g'
option path 'platform/ar933x_wmac'
option channel 'auto'
option txpower '10'
option country 'DE'
config wifi-iface
option device 'radio0'
option mode 'ap'
option ssid 'NETWORK_SSID'
option encryption 'psk-mixed'
option key 'PASSWORD'
option network 'lan'
Note: The wifi-device may be called different on other routers. Usually the config wifi-device section can be left "as is" and the actual wireless SSID and encryption is set up solely in config wifi-iface.
/etc/config/firewall
config defaults
option syn_flood '1'
option input 'ACCEPT'
option output 'ACCEPT'
option forward 'REJECT'
config zone
option name 'lan'
option input 'ACCEPT'
option output 'ACCEPT'
option forward 'ACCEPT'
option masq '1'
option network 'lan'
config zone
option name 'wan'
option input 'REJECT'
option output 'ACCEPT'
option forward 'REJECT'
option masq '1'
option mtu_fix '1'
option network 'wan wan6'
config forwarding
option src 'lan'
option dest 'wan'
config rule
option name 'Allow-DHCP-Renew'
option src 'wan'
option proto 'udp'
option dest_port '68'
option target 'ACCEPT'
option family 'ipv4'
config rule
option name 'Allow-Ping'
option src 'wan'
option proto 'icmp'
option icmp_type 'echo-request'
option family 'ipv4'
option target 'ACCEPT'
config rule
option name 'Allow-IGMP'
option src 'wan'
option proto 'igmp'
option family 'ipv4'
option target 'ACCEPT'
config rule
option name 'Allow-DHCPv6'
option src 'wan'
option proto 'udp'
option src_ip 'fe80::/10'
option src_port '547'
option dest_ip 'fe80::/10'
option dest_port '546'
option family 'ipv6'
option target 'ACCEPT'
config rule
option name 'Allow-MLD'
option src 'wan'
option proto 'icmp'
option src_ip 'fe80::/10'
list icmp_type '130/0'
list icmp_type '131/0'
list icmp_type '132/0'
list icmp_type '143/0'
option family 'ipv6'
option target 'ACCEPT'
config rule
option name 'Allow-ICMPv6-Input'
option src 'wan'
option proto 'icmp'
list icmp_type 'echo-request'
list icmp_type 'echo-reply'
list icmp_type 'destination-unreachable'
list icmp_type 'packet-too-big'
list icmp_type 'time-exceeded'
list icmp_type 'bad-header'
list icmp_type 'unknown-header-type'
list icmp_type 'router-solicitation'
list icmp_type 'neighbour-solicitation'
list icmp_type 'router-advertisement'
list icmp_type 'neighbour-advertisement'
option limit '1000/sec'
option family 'ipv6'
option target 'ACCEPT'
config rule
option name 'Allow-ICMPv6-Forward'
option src 'wan'
option dest '*'
option proto 'icmp'
list icmp_type 'echo-request'
list icmp_type 'echo-reply'
list icmp_type 'destination-unreachable'
list icmp_type 'packet-too-big'
list icmp_type 'time-exceeded'
list icmp_type 'bad-header'
list icmp_type 'unknown-header-type'
option limit '1000/sec'
option family 'ipv6'
option target 'ACCEPT'
config include
option path '/etc/firewall.user'
config rule
option src 'wan'
option dest 'lan'
option proto 'esp'
option target 'ACCEPT'
config rule
option src 'wan'
option dest 'lan'
option dest_port '500'
option proto 'udp'
option target 'ACCEPT'
config zone
option name 'vpn'
option output 'ACCEPT'
option network 'vpn'
option masq '1'
option input 'REJECT'
option forward 'REJECT'
config rule
option target 'ACCEPT'
option src 'lan'
option dest 'vpn'
option name 'VPN'
option family 'ipv4'
Check Packet Route
After the router boots up, one can validate if traffic indeed travels through the PPtP tunnel by,
- traceroute command from your computer once connected to the MR3020
- In the LuCi interface under Status/Route
- In the LuCi interface under Network/Diagnostic/Traceroute
If the configuration was successful the packets should take a route similar to the following:
10.*.*.* ==> 192.168.1.2 ==> 192.168.1.1 ==> ISP and DNS servers
10.*.*.* ==> 192.168.1.2 ==> 192.168.1.1 ==> ISP and DNS servers
Troubleshooting
Failsafe mode
Referring to the hardware specific Failsafe instuctions on the OpenWRT Wiki the process is the following:- Turn off your MR3020
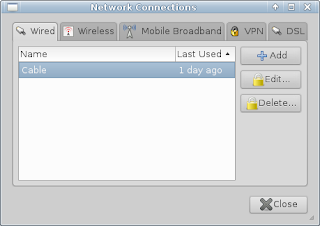
- Set your computer's ethernet IP address to 192.168.1.2 (static). In Ubuntu go to Network connections/Wired/Wired (or Cable, depending how it is named) and click Edit.
Network connections in Ubuntu. 
Setting a static IP address to the ethernet interface in Ubuntu.Netmask can be 255.255.255.0, gateway 192.168.1.1 - Disconnect your computer from other networks.
- Connect your computer to the MR3020 via an ethernet cable.
- Power up the MR3020.
- When the WPS button starts blinking during boot, press it. It should start blinking faster. The router is now in Failsafe mode.
- In a terminal window type,
telnet 192.168.1.1
Note: Even if you have previously set a password to enable ssh, in Failsafe mode only telnet works. - To enable editing files type,
mount_root


Restore to stock OpenWRT
If you have lost track of configurations, sometimes it is easier to simply start over. If you have access to your router via telnet or ssh you can use the following to reset back to factory OpenWRT settings.- Access your router in Failsafe mode and execute the following commands
- mount_root
- mtd -r erase rootfs_data
(Your router might reboot automatically after this step, hence making step 4 unnecessary.) - reboot -f