Tuesday, January 24, 2017

Install Steam Controller on Ubuntu 16.04

I have a Steam controller that I use every now and then and wanted to try it on Ubuntu 16.04. However, the operating system did not recognize the controller automatically, as of 22.01.2017 on a fresh install of Ubuntu 16.04. Luckily, it can be added quickly without any extensive troubleshooting.
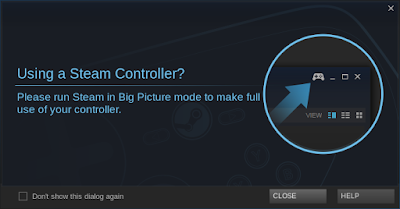

Detecting the steam controller in ubuntu
Ubuntu 16.04 detecting the Steam controller for the first time.

Add a Controller

Referring to an earlier post from November 2016 on AskUbuntu.com the solution is quite straightforward and applies to a fresh 16.04 install.

  1. To install the controller we have to add a new device manually with udev,
    sudo gedit /lib/udev/rules.d/99-steam-controller-perms.rules
  2. There is no such file by default, so the above command will create it. Simply copy the following into it,
    # This rule is needed for basic functionality of the controller in Steam and keyboard/mouse emulation
    SUBSYSTEM=="usb", ATTRS{idVendor}=="28de", MODE="0666"

    # This rule is necessary for gamepad emulation; make sure you replace 'GROUP' with a group that the user that runs Steam belongs to
    KERNEL=="uinput", MODE="0660", GROUP="GROUP", OPTIONS+="static_node=uinput"

    # Valve HID devices over USB hidraw
    KERNEL=="hidraw*", ATTRS{idVendor}=="28de", MODE="0666"

    # Valve HID devices over bluetooth hidraw
    KERNEL=="hidraw*", KERNELS=="*28DE:*", MODE="0666"

    # DualShock 4 over USB hidraw
    KERNEL=="hidraw*", ATTRS{idVendor}=="054c", ATTRS{idProduct}=="05c4", MODE="0666"

    # DualShock 4 wireless adapter over USB hidraw
    KERNEL=="hidraw*", ATTRS{idVendor}=="054c", ATTRS{idProduct}=="0ba0", MODE="0666"

    # DualShock 4 Slim over USB hidraw
    KERNEL=="hidraw*", ATTRS{idVendor}=="054c", ATTRS{idProduct}=="09cc", MODE="0666"

    # DualShock 4 over bluetooth hidraw
    KERNEL=="hidraw*", KERNELS=="*054C:05C4*", MODE="0666"

    # DualShock 4 Slim over bluetooth hidraw
    KERNEL=="hidraw*", KERNELS=="*054C:09CC*", MODE="0666"
    Make sure to replace GROUP with the user's group that will run Steam. In most installations your username and group will be username:username, hence your username will suffice. If in doubt, you can check what groups you belong to simply by,
    groups username
  3. Unplug the controller adapter if it was plugged in.
  4. Re-plug the controller adapter. 
That should be it. Enjoy gaming.

Saturday, January 21, 2017

Install Cura 2.x on Ubuntu 16.04

Cura is a slicer software that prepares your 3D drawings for printing. Installing the latest version on Ubuntu 16.04 was not as easy as downloading the .deb file and installing it from the official site at: https://ultimaker.com/en/products/cura-software.


Cura 2.x running under Ubuntu 16.04

Install Cura 3.x + (Update 2018.02.19)

It was brought to my attention that the below repository may not be actively maintained any longer. Also, currently Cura 3.2.1 can be downloaded from the official website, see below, as an App Image. Hence running it is as easy as,
  1. Download the latest Cura version from https://ultimaker.com/en/products/ultimaker-cura-software 
  2. Make the downloaded app image file executable,
    chmod a+x Cura-3.2.1.AppImage 
  3. Run the App,
    ./Cura-3.2.1.AppImage
Now, this is only a read-only app image, so it will not come up in your  dash searches. You can still make an alias for it or even make a desktop launcher if you prefer.

Install from repository (Depreciated)

Firstly, since Cura depends on python 3.x, let's get the dependencies first,
sudo apt-get install python3 python3-dev python3-sip
Then add the following repository,
sudo add-apt-repository ppa:thopiekar/cura
Finally, update packages list and install cura.
sudo apt-get update && sudo apt-get install cura
After this you should be able to run cura either with the command cura from the terminal or from searching through dash.
Cura
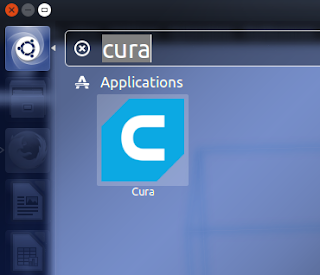
Launch Cura from Ubuntu dash,

Saturday, January 7, 2017

Send email with PHP and crontab on reboot in Ubuntu

Even with the best VPS services reboots can happen: maintenance, hardware upgrade, kernel upgrade. Most of the time users are warned in advance so that they can prepare for the service outage. However, it can happen that there is a reboot and you did not know about it or simply forgot. 

I just added a small php script to my server to send me an email if it was rebooted. This way I can log in ASAP and restart services that do not start automatically.

Send email via PHP

This assumes that you have php installed on your Ubuntu instance.

A simple php program to send emails can look like this:

<?php
$to = "email@address.com";
$subject = "Reboot";
$txt = '

Hello, your server has been rebooted and services have most likely stopped.
If this reboot was unscheduled please log in to restart services.

Have a nice day!
';


// To send HTML mail, the Content-type header must be set
$headers  = 'MIME-Version: 1.0' . "\r\n";
$headers .= 'Content-type: text/html; charset=iso-8859-1' . "\r\n";

//More headers
$headers = "From: server@server.com" . "\r\n" .
"CC: ";

mail($to,$subject,$txt,$headers);
?>

It is kind of self-explanatory, but just to explain quickly: 

to: email address of the recipient
subject: subject of the email
text: main body of the email until the final semicolon (;). Note that you can also send html-based emails. To do this, simply used the html codes such as,
$text = '<html>
<head>
</head>
<body>
This is a html <br> message!
</body>
</html>'
headers: sets the message header. You can write any email address in the "from" field.
mail($to,$subject,$txt,$headers); : sends the email with the previously defined variables above.

Create and test

  1. You can save the above in a .php file. (I prefer to have a MyScripts directory in my /home, just to keep everything organized.)
  2. Test if the program is working.
    sudo -u www-data php -f rebootMail.php
    This will call php, as the user "www-data", and launch the specified file. If your web server's default user is not www-data, adjust accordingly.

Note: If you have a web server running, you can run the above php program from your web browser. Simply copy the rebootMail.php into your /var/www (or wherever your web server's / is) and visit serveraddress.com/rebootMail.php. If you have done everything correctly, you should receive an email. Although, in this case the php program can be executed by anyone visiting it's web address.

Auto-launch program on reboot 

This can be done either via crontab or using /etc/rc.local. Let's do it via crontab.
  1. To edit existing cron scheduled tasks (no sudo needed),
    crontab -e
  2. In a new line at the end of the file add,
    @reboot /usr/bin/php /path/to/rebootMail.php
  3. Save changes and exit the nano editor,
    Ctrl + O
    Ctrl + X
Done. If all done correctly, you should now receive an email on every reboot. To make sure everything is well configured, you should reboot your server manually once and confirm that it works.

Note: If your php is not installed in /usr/bin, adjust the path accordingly.