Sunday, September 11, 2016

Change Banana Pi M3 CPU Frequency

This is a short script for changing the CPU clock rate of the Banana Pi M3 in the allowable steps between 480 MHz to 1.8 GHz.

Motivation

Since the Banana Pi M3 heats quite a bit at 1.8 GHz (even with heat sinks), lowering the CPU frequency can bring these temperatures down. The clock rate can be tuned between 480 MHz and 1.8 GHz by default, possibly up to 2 GHz when the CPU voltages are adjusted and unlocked. 

Note: This script only adjusts the speed up to 1.8 GHz.

How-to

  1. Download the script from Pastebin [Direct Download
  2. Copy it over to your Banana Pi M3
    scp BananaPiM3_FrequencyChanger.sh user@bananapi:/home/remoteuser/
  3. Make it executable
    chmod +x BananaPiM3_FrequencyChanger.sh
  4. Run it with
    ./BananaPiM3_FrequencyChanger.sh

Optional:  Add an alias in your .bash_aliases to call it faster!
echo "alias frequency='./BananaPiM3_FrequencyChanger.sh'" >> .bash_aliases
Apply the changes with,
source .bashrc
From now on you can call the script with
frequency
Screenshot of the script in action.
Screenshot of the script, setting my board's frequency to 1 GHz.

Wednesday, August 31, 2016

Large Heat Sink on Banana Pi M3

So while I was playing with the idea of running BOINC - on my otherwise mostly idle - octa-core Banana Pi M3, I remembered that the previously added tiny heat sink will probably not do much good. The CPU is still easily heating to 65-67 degrees Celsius even with a CPU clock rate set to 1GHz and under moderate load.
Small heat sink installed on my Banana Pi M3

Sizing

I started looking around in my "random parts box" and found a roughly 5*5 cm aluminium heat sink, with a slight plateau on the bottom, in the centre line where something used to be attached. Unfortunately, there isn't any mounting opportunity on the board and everything is tightly packed. The CPU and the RAM are the same height, but some parts directly next to them are slightly higher and this puts a limit on how large the heat sink can be. I measured and a roughly 3.5*2.5 cm heat sink should give enough clearance from nearby parts. I had to cut my heat sink into pieces, but it worked.
Heat sink cut into 3 parts. 1 scrap and 2 useful sides.
Heat sink cut into 3 parts. Bottom one is scrap, left and right are the right size.

Mounting

I cleaned and polished the cut edges a bit and made sure it fits on the board. I put a grain of thermal paste on both the CPU and RAM and aligned the part carefully. It fits just right and the paste also gives a bit of mechanical stability, although not much. It is not visible on the pictures, but to hold the heat sink in place I have used 2 pea-sized balls of glue on the side of the heat sink close to the GPIO pins. Ideally I would have used a glue gun, but since I do not have one, I used the 2 component Pattex glue paste.

As you can see below, the heat sink has an odd-shape with one "arm" extending over the eMMC storage (to the right), whereas contact is only made on the left side with the CPU and RAM. I realize it is an oddly shaped heat sink, but the shape allowed me to use a surface area as large as possible.

Large heat sink mounted on the Banana Pi M3.

Large heat sink mounted on the Banana Pi M3. Side view.


 It is an odd shape, yes, but it is the added thermal mass and the surface area that matters.

Result

  • I have been running BOINC on 6 cores at 100% load, using a clock frequency of 1GHz for about 45 minutes and the temperature seems to have maxed out at 62-63 degrees Celsius. Ambient temperature of 27 degrees Celsius.
  • The heat sink seems to sit tightly, despite the agreeably dodgy mounting. I wish I could have added some screws, but there simply isn't enough space.
  • The possible drawback is that since the heat sink covers both the RAM and CPU, it is quite likely that it is in fact heating the RAM. I am not sure if this is the case - or to what degree as the RAM was usually hot as well, just checking by touching - nevertheless, I'll keep an eye on this.
I will do a bunch of testing to see what temperatures I get at different CPU speeds and number of cores used. Stay tuned.

Running BOINC on Banana Pi M3

So I have my Banana Pi M3 sitting on my shelf, pretty much only serving as a low-power file server with samba shares. 8 cores, doing nothing 99% of the time. So I though, why not run BOINC on it and contribute to science projects a bit?

Hardware

  • Banana Pi M3 (clocked down to 1GHz)
  • Seagate 2 TB HDD
  • Debian Jessie, as shown below.
lsb_release -a
No LSB modules are available.
Distributor ID:    Debian
Description:    Debian GNU/Linux 8.5 (jessie)
Release:    8.5
Codename:    jessie
uname -a
Linux bananapi 3.4.39-BPI-M3-Kernel #22 SMP PREEMPT Wed Mar 16 12:07:48 CST 2016 armv7l GNU/Linux

Install

Installation is pretty straightforward and worked for me out of the box on the above mentioned installation.
  1. sudo apt-get update && sudo apt-get upgrade
  2. sudo apt-get install boinc-client

Running

Now I don't have a screen attached to my Banana Pi M3, so I didn't download the boinc manager. There is the text interface tool, called boinctui, however I made the experience that it doesn't allow to connect to BAM! account manager. Hence I would rather connect from another machine on my local network with the boinc manager.
Furthermore, I would strongly recommend using an account manager (https://boincstats.com) and making a new "Work Preference" setting especially for the Banana Pi / other ARM devices. I have assigned 6 CPU cores total and a maximum usage of 100%. Also, the CPU clock rate of my device is throttled down to 1GHz to avoid overheating. (Yes, 8 cores heat quite a bit) Like this I am getting up to 63 degrees Celsius, thanks to my new over-sized heat sink!

To allow a remote boinc manager to connect I am running the client with the following command:

boinc --daemon --dir /path/to/BOINC/directory --no_gpus --allow_remote_gui_rpc 

As you can see I have a --dir option in there, which specifies the BOINC default directory. I have specified this on my 2 TB HDD so that there is plenty of space and not the 8 GB eMMC is used. It is running smoothly.
Running BOINC on my Banana Pi M3, currently 6 cores at 1 GHz.


Connect remotely

On your remote machine launch Boinc manager and go to File/Select Computer. In the popup window enter the IP address of the Banana Pi and the password. The latter is stored in the default BOINC directory under /Boinc/directory/gui_rpc_auth.cfg.  You can edit this simply with 
sudo nano /Boinc/directory/gui_rpc_auth.cfg
Select computer to control with Boinc manager
Select computer to control with Boinc manager.
After this you can easily add an account manager and synchronize with the projects and settings as per configured at https://boincstats.com. This way you can remotely adjust the settings as needed later on.

Considerations

HDD spin up/down timeout

By default you may have noticed that an attached hard drive is on continuously, it doesn't enter sleep/stand-by mode. To avoid this, I have added the following to my /etc/rc.local
sudo hdparm -S 25 /dev/sdb
This tells the drive to spin down if there was no activity in the last 25*5 seconds. Now if you have done the same, the smart thing to do (I guess) would be to limit  how often the boinc client can access the drive. I don't want it to have access every 60 seconds and spin up the drive for 5 seconds to write something and then wait 60 seconds again. This would be wasteful in terms of drive lifetime. Hence I would recommend setting the "Write to disk at most" parameter in the client settings to reasonably value. I am testing 1000 seconds for the moment.
This can be configured in your BAM! account at https://boincstats.com/en/bam/workPreferences/.

CPU clock settings

At the maximum of 2 GHz the 8 cores produce quite a bit of heat and therefore would continuously throttle back the whole device. Therefore I would recommend setting the maximum frequency a bit lower. The relevant system directory is /sys/devices/system/cpu/cpu0/cpufreq.
To see the available frequencies
cat /sys/devices/system/cpu/cpu0/cpufreq/scaling_available_frequencies

I have made the following script that sets up my CPU clockrate on every boot. From this you can easily deduct how to set what.
#!/bin/sh

#Sets the CPU's core frequency

echo ondemand > /sys/devices/system/cpu/cpu0/cpufreq/scaling_governor
echo 1000000 > /sys/devices/system/cpu/cpu0/cpufreq/scaling_max_freq
echo 480000 > /sys/devices/system/cpu/cpu0/cpufreq/scaling_min_freq
echo 25 > /sys/devices/system/cpu/cpufreq/ondemand/up_threshold
echo 10 > /sys/devices/system/cpu/cpufreq/ondemand/sampling_down_factor
You can save this script, make it executable with
sudo chmod +x script.sh
And then call it from e.g. /etc/rc.local to run at system boot.

You can experiment a bit to see what is best.

Heating

Check out my post to see how I have resolved this issue.
Large Heat Sink on the Banana Pi M3.

Sunday, May 1, 2016

Cannot set password for user with adduser

Recently with my Banana Pi M3 I was having multiple issues while installing. One of them was an error message when trying to set up a new user. See the error message below.

Current password:
New password:
New password (again):
passwd: Authentication token manipulation error
passwd: password unchanged

Smyptoms

When adding a new user with
sudo adduser $user
The system does not accept a password and produces the above message.

Solution

I have found that removing the (non existing ?) password from the user is the only way to solve the problem quickly. It is a weird thing, I have no clue what is causing this.
While logged in as any user with root privileges (sudo), delete the $user password,
sudo passwd -d $user
And set a new password for $user,
sudo passwd $user
It should work now.

Credit goes to Askubuntu.com. Thanks!

Banana Pi M3 (v1.2) - First Tests

This is a short summary of my experience with my newly obtained Banana Pi M3 (v.1.2) board.  I am touching on the following topics,
  • Operating systems
    • Installing an OS on the internal eMMC storage (no SD cards finally!)
    • Expanding the file system to the whole eMMC size
  • The  Hardware
    • What power supply to get
    • Read & Write speeds from/to 2.5" HDD
    • Encrypted containers and their speeds
  • Temperatures
    • Passive cooling with heat sink
    • Forced cooling with a small USB fan
    • Controlling CPU frequency to limit heat generation

So three weeks ago on Thursday I have received my Banana Pi M3 v.1.2 board. In my excitement - despite not having slept enough for the previous 2 weeks - I have started to write OS .img files to different SD cards to quickly try out my new toy before going to bed. Well, long story short I have managed to dd my laptop's / (/home was on a separate partition, so it was not a major issue, but still annoying). To reinstall so I had to burn some of those DVD things that were so popular about 10 years ago. The good news is, now I'm running Ubuntu 16.04, an update that was due anyway for my (previous) 12.04 system.

My project aims

No SD cards please!

I had quite a bit of bad luck with continuously failing class 10, branded SD cards with my Raspberry Pi B previously. Therefore, I was happy to see a single board computer on the market that has an on-board storage. One of my main motivations hence was to work without the need for (permanent) SD cards.

Home theatre PC

I have a now old Raspberry Pi B running Kodi that serves as my HTPC (if I can say that) connected to a TV. The Banana Pi M3 would be primarily an upgrade to this system that would hopefully add that snappy & fast response and uninterrupted video playback even at high bit rate videos.

Cheap file server

On the other had, I am running out of storage space on my devices and currently I cannot go for a proper NAS;something worthwhile buying that would last for years is over 600€. Unfortunately, I cannot afford that right now. Until I do, I'd love to use the BPi M3 with an external HDD as a samba share as well as backup storage for my files. Support for encryption would be a big plus.

Others

I am also planning to run a few additional services here, mainly scripts and bots automatizing some tasks for me.

First look

Banana Pi M3 v1.2 board.
Banana Pi M3 v1.2 board. Note the micro USB as well as the 5V jack plug on the bottom left corner. Both can supply power, however it is advised to use the jack plug.

The technical specifications can be found at banana-pi.org, so I won't detail these. However, a few important things that are easy to skim over before you decide to buy,
  • The "SATA" connector actually uses a SATA to USB bridge, hence the speed is limited by the USB 2.0 hub's theoretical speed of 480 Mbps. Sad.
  • The newest board (as far as I know, v1.2) has both a micro USB OTG and a 5 V DC input. Do not power the board via micro USB. I have a 2A micro USBpower supply, but I wasn't able so far to detect a SATA connected external 2TB 2.5" HDD. Using a a 5V DC jack power supply has resolved this.
  • The board uses a micro SD card.
  • Boots readily from the on-board eMMC. There is an 8 GB (7.3 GB) on-board eMMC flash storage. I could burn a linux image in it easily using dd, but I couldn't boot the board without the SD card in it for a while.  Repeating the same process exactly has resolved the problem. Somehow (I reckon it was some OS image issue). 

Operating System

This is a tricky part. There are images available (also here) to download where I have gone with the most recent ones to try as earlier this year and end of 2015 there was quite a a bit of negative feedback about bugs. 

Ubuntu Mate 15.10 for BPI-M3 GPU PowerVR SGX544MP (20160317) is probably damaged/broken as I have tried writing it to the flash storage and it always failed to boot. On some occasions the file system was already corrupted and / could not be mounted on boot.

I have decided to go for Debian Jessie 8.4 from above and flashed it to the on-board eMMC. I strongly recommend this (latest, as of now) OS image. No more SD cards!
Debian Jessie 8.4
At this point I have to say that I have been unable to install kodi on Debian Jessie after many days of trying. I figure that the gpu is still not properly supported.

Summary

There is continuous development and a new Ubuntu 16.04 LTS image should be coming out soon, stay tuned! Currently, support is quite low. I would only advise for developers and people who would like to tinker with an upcoming hardware.

Writing to the on-board eMMC storage

Let us leave SD cards behinds as this was one of my main motivations over buying a newer model of Raspberry Pi. I had to throw out and reinstall too many SD cards to start using them again. The Banana Pi M3 has a net of 7.3 GB on-board flash storage. To write an image to it, first you have to boot from an SD card. This is well explained in other tutorials, but the method is same in all cases,
  1. Download an .img file
  2. Find out what is the device number of the SD card /flash storage
  3. Write image with dd
So, respectively if you are on a Linux machine or already booted the banana Pi from an SD card,
lsblk
will list the devices you have. On your computer the SD card probably shows up as /dev/sdb whereas if you are running the Banana Pi the internal storage will likely be /dev/mmcblk0 and the SD card shows up as /dev/mmcblk1.

I am pretty sure mmcblk0 is the flash and mmcblk1 the SD card by default on every board. To write a .img file to the flash storage you do as you normally would with an SD card,
sudo dd if=/debian-jessie-8.4.img of=/dev/mmcblk0 bs=1M
Where
if - input file, the img file you want to write
of -output file, in this case the internal storage

Once finished, you can run lsblk again to confirm that partitions have been written. You should see something like on the image below.

Banana Pi eMMC and SD card partitions
Banana Pi with Debian 8.4. mmcblk0 stand for the internal storage whereas mmcblk1 shows an inserted SD card. p1 & p2 stand for partitions one and two, respectively.


Note: You can specify a block size of 1-10 MB if you want for dd, but it is not necessary. Use e.g. bs=1M at the end of the dd command.
Also, dd doesn't have any status indicator of the process. If it doesn't give you an error, it is running. Let it finish.

Warning: dd is dangerous, so make sure you are writing to the good partition with it, it can easily overwrite other data. I take no responsibility if you delete anything.

Expanding the file system

Sometimes the .img file you write to the SD card to eMMC storage is smaller than the actual storage space you have. However, in this case some of the space will be unrecognised and hence cannot be used until you expand the file system. You can do this directly from the Banana Pi while running, it will require one reboot. This will NOT delete any data from your SD card or the on-board eMMC storage.

Explanation:
What happens here is the following:  The first partition mmcblk0p1 is the boot partition and it occupies the first X sectors of the "disk". The second partition starts with the following sector and occupies some amount of sectors, however not until the last one. Hence part of the space is not "seen" by the device. Herein lies the problem. What we have to do is that we have to redefine this second partition and specify to last until the last sector on the disk. Essentially we have to delete the second partition (mmcnlk0p2) and recreate it, such that it starts immediately after the first partition (like before). However, this time we tell the OS to make the partition last until the end of the disk, that is the last sector. This process does not cause data loss as the partition is not formatted, only expanded to free space after the current sectors.

There is a nice tutorial on how to do this on gleenders.blogspot.com. The steps you have to do to expand the on-board storage on the Banana Pi is pretty much the same,
  1. sudo fdisk -l
    Check from the output which one is the eMMC storage. I assume here its /dev/mmcblk0
  2. sudo fdisk /dev/mmcblk0
  3. Press "p" to list partition table on the device. You will most likely see 2 partitions, with the second one being several GB in size. Remember the last sector of the first partition. The second one needs to be deleted, set to start right after the end of the first partition and last until the last sector.
  4. Press "d" to delete a partition and select the second one.
  5. Press "n" to create a new partition and choose "p" for primary". Specify the first sector of the partition starting right after the first partition (you should still see this information above in your terminal window). The last sector should be the last sector of the drive.
  6. Press "w" for writing the partition table
  7. Reboot your Banana Pi,
    sudo shutdown -r now
  8.  Log in via ssh and resize the partition finally with,
    sudo resize2fs /dev/mmcblk0p2
Note: This does not delete any data from the drive, if done correctly.

Hardware

Power supply

Initially I have tried to power the board from a micro USB port, however this was unsatisfactory as it was unable to power a 2.5" HDD. Next, I have ordered a 5V 3A DC jack power supply, and this worked perfectly. I got a multi-adapter power supply for 16€ from Amazon.de. It comes with plenty of adapters and I can re-use it later on for other projects if I need.
KFD universal network adapter, 5V 3A power supply that works well with the Banana Pi M3 (Also comes with a bunch of adapters, so can be used for other projects as well)
Note: When you are buying a power supply, make sure you get the right adapter at the end! Refer to BPi M3 DC Power Interface.

2.5" Hard Drives

At least using the latest Debian Jessie (8.4) hot plugging of HDDs is allowed (the raspberry Pi B reboots if you connect a HDD as it creates a power surge). Using my DC power jack cable I can have a 2 TB 2.5" Seagate HDD connected and powered via one of the USB ports. Of course, it can be connected and powered via the SATA connector as well.

Writing to the Hard Drive
Copying over via Gigabit Ethernet from my Linux laptop I got an average speed of 14.6 MB/s. This was roughly the same when copying from Windows as well.
14.6 MB/s write speed to HDD
Write speed to 2.5" Seagate HDD via Gigabit LAN connection. 14.6 MB/s
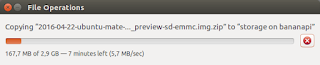
Write speed to 2.5" Seagate HDD EncFS conatined via Gigabit LAN connection. 5.7 MB/s


Reading from the Hard Drive
Again, copying to my laptop from the HDD via gigabit Ethernet connection resulted in read speeds close to that of the write speed, 13.3 MB/s. Interesting that it is lower than the write speed, I assume it is just some fluctuation and that it is the same, limited by the USB connection. The Read speed from the EncFS container was not severely affected, it was around 9 MB/s.

Read speed of 13.3 MB/s
Read speed from 2.5" Seagate HDD via Gigabit LAN connection. 13.3 MB/s

Read speed of 8.7 MB/s from EncFS
Read speed from 2.5" Seagate HDD EncFS conatner via Gigabit LAN connection. 8.7 MB/s


Note: Possible hardware "bug" is that after powering down the board, the HDD is still powered on, whether it isconnected via the SATA or the USB port. Only way to power down the HDD is to disconnect it from the board. Furthermore, if the board is powered down, USB HDD is plugged it, even though the HDD powers up automatically, the board won't power up. The HDD has to be disconnected, the board started and finally the HDD can be plugged in again.

Encrypted Hard Drive

Connecting the drive with the new power supply was easy and the BPi M3 recognized it straight away. The two options I am still considering for encryption are,
  • veracrypt (after Truecrypt has been discontinued)
    I have managed to install the command line version of it to the BPi M3 without problem and could mount the 2 TB HDD. The write speed over Samba shares has spiked and then quickly dropped to 0 in all my tests and eventually got interrupted. This seemed like a dead end and I didn't test any further.
  • EncFS
    Can be set up relatively simply, however reduces the write speeds to the drive to 30% of the original.
Veracrypt, as far as I know,  offers a higher level of security than an EncFS, however EncFS scales pretty nicely with written data and I wouldn't need to convert an entire 1.7 TB drive. (I have used a computer to do it over USB 3.0 and it took 14-15 hours) If anyone has managed to get decent speeds writing to a Veracrypt container, I would be happy to hear it!
 

Temperatures

The CPU can be clocked up to 1.8 GHz dynamically, depending on the load, whereas the minimum running frequency is 480 MHz. Of course, the higher the load on the CPU, the higher the frequency will be scaled by cpufreq and consequently it will get hotter.

The CPU gets pretty hot just by idling, so some sort of cooling is advised, if not compulsory. The idle temperature I got was around 53 degrees C. Temporarily I was using a small externally powered USB fan, but then decided to get a small heat sink from Amazon, which has proven to work well on my Raspberry Pi B previously. 14 x 14 mm heat sink fits perfectly on the CPU.

14 x 14 mm black aluminium heat sink from Amazon
Banana Pi M3 board with a heat sink added on the CPU

Passive cooling

With the small Aluminium heat sink the CPU's temperature started off at 40 C and then slowly rose to 52 C when idle. Running an apt-get update has ramped up this temperature to 57 C. Therefore, I'm planning on buying a small plastic case where I can fit the Banana Pi M3, a 2.5" HDD and also a cooling fan that can be powered with under 5 V (to reduce speed and collateral noise).

Heat sink of my choice (as visible on the picture above) is from Amazon.de. The dimensions 14 x 14 mm fit the processor perfectly, so feel free to buy anything you deem fit.

Software solution

CPU scaling is a "soft" solution that can be applied and I also recommend this. The frequency of the cores can be scaled from 480 MHz to 1.8 GHz. However, if you want to run all 8 cores at 1.8 GHz, you need forced cooling (fan), otherwise cpufreq throttles back the frequency and perhaps also shuts off some cores.

With my heat sink and limiting the CPU frequency to 1 GHz, the CPU gets to 53 C during a simple apt-get upgrade.

Maxing out all the 8 cores, with my CPU cooler heat sink I got up to 67 C at 1 GHz. Since it was 2 a.m., I decided to put a fan nearby and set the maximum frequency to 1.6 GHz to speed up compiling. This has reached a steady temperature of 51 C, however I have to say this is not sustainable as the small USB fan I am using is annoyingly loud. With the same fan and process, at 1 GHz the CPU stabilizes at 40C. A moderate 1 GHz should be roughly the maximum one could use with some heat sink, without forced cooling. Without one, I would perhaps go as low as 700 MHz to avoid overheating. Operating with default settings and no heat sink or cooling, the CPU easily reaches 65 C where it gets throttled back.
Maxing out all 8 cores
Maxing out all 8 cores (set to 1.6 GHz) while compiling Kodi from source

1.6 GHz with heat sink and fan 51 C
CPU at 1.6 GHz heats to 51 C when using heat sink and USB fan cooling maxing out all 8 cores
My final setting is 1 GHz with just the heat sink, no fan. If the temperature gets to 65 C, the OS throttles the cores back. However, this only happens if all 8 cores are running at 100% e.g. when compiling stuff from source.

Is it worth to get a heat sink?

Well. What I have observed is that without the heat sink the CPU's temperature spikes within seconds over 60C when maxing out all cores. Compared to this, with heat sinks it has a larger thermal mass, and some additional heat transfer to the ambient air and therefore a more smooth heating up and cooling down. I would say it is a slight improvement, especially if only spikes happen on the CPU and not running continuously at 100%.

If the plan is to use a fan, I would say there is no need to spend money on such a small heat sink.
In general, getting a heat sink is most likely not needed at all. I would not buy it again, instead I would simply limit the CPU frequency and trust the device (since it should be built in such a way that it doesn't melt when I use it, right?).

Troubleshooting

There were some issues while installing and configuring, I hope my experience will help others resolve their problems quicker!
 

Welcome to Emergency mode!

Welcome to emergency mode

If there is an entry in /etc/fstab that cannot be executed at boot, the boot from the flash storage will fail. E.g. if you define a HDD in /etc/fstab and then try to boot without it connected, the Banana pi won't boot. Commenting it out in fstab resolves the problem otherwise you are greeted with the "Welcome in emergency mode" message. (source)


As usual, if you have any questions, do not hesitate to ask. Also, if you have any cool project going on with the Banana Pi (and/or have managed to get Kodi running), I would be happy to hear it!

Saturday, April 30, 2016

"Invalid VPN secret" and only "add PPTP" in Network-manager

I will give the solution here to 2 annoying problems that I have encountered in Ubuntu 16.04 with VPN settings. 

Problem

The VPN connection to ... has failed because of invalid VPN secrets.

Network manager has no option to add openVPN, only point to point tunneling protocol connections.

Solution

These two issues are related, or I strongly assume, and the solution is to install some packages,
sudo apt-get install network-manager-openvpn network-manager-openvpn-gnome network-manager-pptp network-manager-vpnc

OpenVPN appears in network manager after installing selected packages
After installing the above packages, OpenVPN is back in the network manager.
To aply changes you may have to restart the network manager with
sudo service network-manager restart 
or simply reboot your computer.

Thanks to askubuntu.com. You can also set up easily a VPN autoconnect at boot after this.

Sunday, February 14, 2016

ownCloud 8.1 APCu Memcache error

Yet another error I encountered while tweaking my ownCloud installation on my VPS at time4vps.eu. I was trying to enable the APCu memory caching to improve performance on my ownCloud 8.1 running with php 5.5.9 on an Ubuntu 14.04 server. 

Problem

I was following the guide and instructions found under doc.owncloud.org, however I quickly encountered a problem. Upon installing php5-apcu with
sudo apt-get install php5-apcu
and enabling it as per the guide, I was greeted with a white screen when trying to log in to owncloud. No error messages, it seemed the server just didn't load. No entries in logs under /var/log/. Interesting.

Solution

It took me a while to figure out what happened, finally I stumbled upon this github issue 14386.

Basically it turns out that in Ubuntu 14.04 if you install php5-apcu with apt-get install you will get APCu version 4.0.2 and the required version for ownCloud is 4.0.6 at least. Hence you need to remove the one installed form the repository and install a later version manually.

To check if this is indeed your issue do,
sudo dpkg -s php5-apcu
This should return the currently installed php5-apcu version. If this is older than 4.0.6 then continue reading.
  1. Remove the old APCu version (if installed via apt-get) with
    sudo apt-get remove php5-apcu
  2. Go to http://mirrors.kernel.org/ubuntu/pool/universe/p/php-apcu/ and copy the link to a version 4.0.6 at least which corresponds with your system's architecture.
  3. cd /tmp/
  4. sudo wget http://mirrors.kernel.org/ubuntu/pool/universe/p/php-apcu/php5-apcu_4.0.7-1build1~ubuntu14.04.1_amd64.deb
    (since my system is amd64 architecture)
  5. Install manually with dpkg
    sudo dpkg -i php5-apcu_4.0.7-1build1~ubuntu14.04.1_amd64.deb
  6. Remove downloaded file
    sudo rm php5-apcu_4.0.7-1build1~ubuntu14.04.1_amd64.deb
  7. Restart your apache2 server
    sudo /etc/init.d/apache2 restart
Note: Make sure you download the correct .deb file, i.e. amd64 or i386.
You can check what kind of system you have with uname -a.

Additional to ownCloud Caching Guide

In addition to the official doc.ownCloud.org guide you might have to adjust some settings in your /etc/php5/cli/php.ini if your installation is still not working. First check if apc.enable is "On" in your php.

Check,
php -i
And look for
apc.enable_cli => On => On
apc.enabled => On => On
If any of them is Off then this is your problem. Edit your php.ini with,
sudo nano /etc/php5/cli/php.ini
and copy the following into the file,
;;;;;;;;;;;;;;;;;;
;Memory chacing  ;
;;;;;;;;;;;;;;;;;;

;Added manually to enable memory chancing for ownCloud
apc.enable_cli=1
Press CTRL+O for saving and CTRL+X for exiting.

Restart apache with
sudo /etc/init.d/apache2 restart
It should work now. If not, you can leave me a message and I will do my best to get back to you or you can also join the IRC channel at #owncloud for some help.

Saturday, February 13, 2016

ownCloud "Server Not Installed" Error on Android Client

I have a server from the guys at time4vps.eu where I am running - among other things - an ownCloud instance. It was basically just a learning exercise to get it up and running, maybe invite a few friends if interested. Then I started also looking at certificates from letsencrypt.org and set up some sub-domains for my server.

Issue

The point where I ran into an issue was after I set up my sub-domains and the required encryption certificates. For some reason the browser login would work, but on my Android device I got an error from various apps saying,
"Server not Installed!"
This was weird, because desktop clients were syncing with absolutely no problem.

Solution

I was clueless for a long time and honestly demotivated to fix this, because I wasn't using it so often. Nevertheless, it was bothering me and whenever I logged into my server I remembered that something is broken and needed to be fixed.

I have spent hours trying to troubleshoot, unfortunately the error logs
/var/log/apache2/error.log
/var/log/owncloud.log
were empty or contained nothing related to the issue.

Finally after some IRC help and searching I stumbled upon the solution at forums.owncloud.org,

In /var/www/owncloud/config/config.php I had an entry
'installed' => 'true',
this had to be replaced by
'installed' => '1',
I have no clue as to why or how this error occurs, however possible there are some issues with the installation. Nevertheless, after changing this entry and restarting my apache the Android client worked right away.

Note: Depending on your installation of owncloud config.php might be elsewhere, e.g. /var/www/config/config.php if you installed it to the "root" web directory.
Editing the file is done by sudo nano /path/to/owncloud/config/config.php

I am troubleshooting further to find the true source of the error, but one issue has been fended off.

Wednesday, January 6, 2016

Bridged OpenWRT Access Point through PPtP

This will be a guide on how to set up a wireless access point that will forward traffic to a host/primary router (this is referred to as bridged AP) through a PPtP connection. The new AP will be created using a TP-LINK MR3020. All traffic from the second router shall go through the PPtP tunnel, while traffic coming from clients connected to the host router shall remain unaffected.

Contents
  • Project Description and Aims
  • Flashing OpenWRT on the MR3020
  • Configuration over LuCi
  • Configuration over SSH (including complete config files)
  • Check Packet Route
  • Troubleshooting

Project Description and Aims


TP-LINK MR


Given is a home router with the address 192.168.1.1 that provides internet access and acts as DHCP server on the local network. The task is to set up a secondary router, a TP-LINK MR3020 (Amazon.com) with the local IP address 192.168.1.2, as a wireless access point (AP) that will bridge the connection over to the main router over the LAN port. Furthermore, all traffic from the secondary router has to go through a PPtP tunnel.
PrivateInternetAccess VPNIf you need a provider that offers PPtP servers, I can recommend Privateinternetaccess where you will get a great VPN provider with PPtP service included. Perfect for both your everyday VPN needs as well as the given scenario.

I will assume a stock OpenWRT Chaos Calmer 15.05 on the MR3020, cleanly flashed without any modifications. Configuration is possible via ssh or over LuCi, both of which will be shown below. In older and potentially newer versions the LuCi UI may look differently.

Illustration shown "normal" internet traffic and the sought PPtP traffic
Illustration of the sought network setup. The blue line illustrates "normal" internet traffic originating from the host router whereas the orange line shows PPtP tunnelled traffic coming from the OpenWRT router and clients connected to it. [picture source]
Host (or primary) router
WiFi Network ==> Internet

Router 2
WiFi Network ==> PPtP enter  ==> LAN interface ==> Host (primary) router ==> Internet (tunnel transmit) ==> PPtP (server) exit ==> Internet

Flashing OpenWRT on the MR3020

This is covered in detail on e.g. OpenWRT wiki MR3020 page, hence I will not go through this.

Once OpenWRT is installed on your router, connect to it via an ethernet cable. The router should handle DHCP, meaning your ethernet port should get an IP address automatically, however if you still have your IP configured to static from flashing the router, that will work too.

Configuration over LuCi

LuCi is technically the UI overlay of OpenWRT that can be reached via 192.168.1.1 by default on a new installation and allows easy configuration via a visual interface. Since the MR3020 has only a single LAN port, the installation is slightly different that it would be with other routers. Essentially the procedure is the following,

  1. Make an initial connection to the router via an ethernet cable
  2. Adjust the LAN interface such that it will have access to the internet through the host router
  3. Set up WiFi network
  4. Disconnect your computer from the router and connect it to the primary router
  5. Connect to the OpenWRT router via WiFi
  6. Install ppp-mod-pptp package (This provides PPtP support, which is not installed by default)
  7. Add vpn (PPtP) interface
  8. Edit again the LAN interface to bridge all 3 networks
  9. Set up forwarding and firewall rules
  10. Reboot, if necessary.

Step 1.

In your web browser navigate to 192.168.1.1 (by default) and log in using the default credentials,
Username: root
Password: admin
OpenWRT Authorization
OpenWRT LuCi login page by default under 192.168.1.1 in your web browser.

Step 2.

Go to Network/Interfaces and click Edit for the LAN interface. This should be the only one available with the MR3020. Fill it out as shown below, according to the previously discussed network specifications.
Primary router (gateway): 192.168.1.1
OpenWRT (secondary router): 192.168.1.2
IPv4 netmask: 255.255.255.0
Use custom DNS servers: 192.168.1.1

LAN interface general setup for the given scenario.
LAN interface General setup using a primary router with the address 192.168.1.1 and the OpenWRT router as 192.168.1.2.

Step 3.

Go to Network/WiFi and click Edit. This section is self-explanatory and the configuration settings have no effect on the working of the bridged AP & PPtP. The only important thing here is to assign the WiFi interface to the LAN zone at the bottom of the page, as shown below.
WiFi Interface, added to LAN zone.
WiFi interface configuration. Make sure it is added to the LAN zone.

In the Advanced tab you can set the country where you are, which will impact on what WiFi channels you are allowed to use due to local regulations. Another thing that can be set is a Distance Optimization, which will help you adjust the signal strength based on the furthest device.

Step 4.

Save the settings and connect your OpenWRT router via an ethernet cable to one of the LAN ports (not WAN) of your primary router. Disconnect power if you have to, after saving the settings should remain stored.

Step 5.

Connect to your newly created WiFi network and in your browser navigate to 192.168.1.2 where you can log in.

Step 6.

Go to System/Software and click "Update". Then make a search for "pptp" and from the results install the package called ppp-mod-pptp. Refer to the picture below. (Funnily, when searching directly for ppp-mod-pptp I received no search results...)
Available packages containing pptp
Install the ppp-mod-pptp package from the results list.

Step 7.

Go to Network/Interfaces and Add New interface for the vpn with protocol PPtP then click "Edit".
Create Interface. Name it e.g. vpn and select PPtP protocol.
While editing, fill out the fields,

VPN server (IP address or domain name)
Username
Password

You should obtain this information from your service provider.


PPtP settings
PPtP setting when adding the new VPN interface.
When done, click save.

Step 8.

Since a new interface was just added, the LAN interface has to be edited again to bridge 3 interfaces in total (so far it is bridging only LAN and the WiFi). Go to Network/Interfaces and edit the LAN interface. Navigate to the Physical settings tab and make sure to bridge all 3 networks available: eth0, gretap0 and the WiFi interface. The end result should look similar to the following.

LAN physical interface configuration tab common settings.
LAN interfaces Physical settings tab. All 3 interfaces, Ethernet, Wireless and PPtP (gre0 or gretap0) must be ticket at the bridge.

Step 9.

Navigate to Network/Firewall settings and click Add at the bottom of the page to add a new zone for the vpn. Set it up as,
Input: reject
Output: accept
Forward: reject
Masquerading: Yes
Covered network: vpn (or as you called it in Step 7.)

New firewall zone settings for the vpn interface
New firewall zone settings for the vpn interface.
When done, save changes and the following should be present in the Firewall zones.

Firewall Zones settings
Firewall Zones settings.

Step 10.

If changes did not take immediately effect, reboot router. Make sure to save all changes first!
Reboot OpenWRT
Reboot OpenWRT.
Just to check that everything works and packets are going through the PPtP tunnel, proceed to chapter Check Packet Route  below.

Configuring over SSH

You will need to edit 3 files in total (assuming again a stock, unmodified OpenWRT installation) to apply all changes required. These are,
  • /etc/config/network
    Holding the general router interface configurations.
  • /etc/config/wireless
    Responsible for the wireless interface, including WiFi SSID and encryption settings.
  • /etc/config/firewall
    Responsible for assigning different interfaces into different firewall zones (applies different rules to them) and to allow traffic forwarding between interfaces.
Important: Basic vi editing skills are required, once again Here is a cheat sheet for your convenience.
  1. Connect to your OpenWRT router via an ethernet cable and follow the steps from a terminal window.
  2. telnet 192.168.1.1
  3. passwd
    This step sets a password for your router (this will also be the password for the LuCi interface if you wish to use that later!) and also disables telnet further on and enables ssh. Use it as ssh root@192.168.1.1 from this point onwards.
  4. vi /etc/config/network
    Add changes to file from section below!
  5. vi /etc/config/wirelessAdd changes to file from section below!
  6. vi /etc/config/firewallAdd changes to file from section below!
  7. /etc/init.d/dnsmasq disable
  8. reboot
  9. Disconnect the router from your computer and connect it to the primary router through one of its LAN (not WAN) ports.
Copy pasting the settings from below will most likely get you up and running in no time.

/etc/config/network

config interface 'loopback'
    option ifname 'lo'
    option proto 'static'
    option ipaddr '127.0.0.1'
    option netmask '255.0.0.0'

config interface 'lan'
    option force_link '1'
    option type 'bridge'
    option proto 'static'
    option netmask '255.255.255.0'
    option ip6assign '60'
    option ipaddr '192.168.1.2'
    option gateway '192.168.1.1'
    option dns '192.168.1.1'
    option delegate '0'
    option _orig_ifname 'eth0 wlan0'
    option _orig_bridge 'true'
    option ifname 'eth0 gretap0'

config interface 'vpn'
    option proto 'pptp'
    option server 'IP_OF_YOUR_PPTP_SERVER'
    option delegate '0'
    option username 'USERNAME'
    option password 'PASSWORD'

/etc/config/wireless

 config wifi-device 'radio0'
    option type 'mac80211'
    option hwmode '11g'
    option path 'platform/ar933x_wmac'
    option channel 'auto'
    option txpower '10'
    option country 'DE'

config wifi-iface

    option device 'radio0'
    option mode 'ap'
    option ssid 'NETWORK_SSID'
    option encryption 'psk-mixed'
    option key 'PASSWORD'
    option network 'lan'

Note: The wifi-device may be called different on other routers. Usually the config wifi-device section can be left "as is" and the actual wireless SSID and encryption is set up solely in config wifi-iface.

/etc/config/firewall

config defaults
    option syn_flood '1'
    option input 'ACCEPT'
    option output 'ACCEPT'
    option forward 'REJECT'

config zone
    option name 'lan'
    option input 'ACCEPT'
    option output 'ACCEPT'
    option forward 'ACCEPT'
    option masq '1'
    option network 'lan'

config zone
    option name 'wan'
    option input 'REJECT'
    option output 'ACCEPT'
    option forward 'REJECT'
    option masq '1'
    option mtu_fix '1'
    option network 'wan wan6'

config forwarding
    option src 'lan'
    option dest 'wan'

config rule
    option name 'Allow-DHCP-Renew'
    option src 'wan'
    option proto 'udp'
    option dest_port '68'
    option target 'ACCEPT'
    option family 'ipv4'

config rule
    option name 'Allow-Ping'
    option src 'wan'
    option proto 'icmp'
    option icmp_type 'echo-request'
    option family 'ipv4'
    option target 'ACCEPT'

config rule
    option name 'Allow-IGMP'
    option src 'wan'
    option proto 'igmp'
    option family 'ipv4'
    option target 'ACCEPT'

config rule
    option name 'Allow-DHCPv6'
    option src 'wan'
    option proto 'udp'
    option src_ip 'fe80::/10'
    option src_port '547'
    option dest_ip 'fe80::/10'
    option dest_port '546'
    option family 'ipv6'
    option target 'ACCEPT'

config rule
    option name 'Allow-MLD'
    option src 'wan'
    option proto 'icmp'
    option src_ip 'fe80::/10'
    list icmp_type '130/0'
    list icmp_type '131/0'
    list icmp_type '132/0'
    list icmp_type '143/0'
    option family 'ipv6'
    option target 'ACCEPT'

config rule
    option name 'Allow-ICMPv6-Input'
    option src 'wan'
    option proto 'icmp'
    list icmp_type 'echo-request'
    list icmp_type 'echo-reply'
    list icmp_type 'destination-unreachable'
    list icmp_type 'packet-too-big'
    list icmp_type 'time-exceeded'
    list icmp_type 'bad-header'
    list icmp_type 'unknown-header-type'
    list icmp_type 'router-solicitation'
    list icmp_type 'neighbour-solicitation'
    list icmp_type 'router-advertisement'
    list icmp_type 'neighbour-advertisement'
    option limit '1000/sec'
    option family 'ipv6'
    option target 'ACCEPT'

config rule
    option name 'Allow-ICMPv6-Forward'
    option src 'wan'
    option dest '*'
    option proto 'icmp'
    list icmp_type 'echo-request'
    list icmp_type 'echo-reply'
    list icmp_type 'destination-unreachable'
    list icmp_type 'packet-too-big'
    list icmp_type 'time-exceeded'
    list icmp_type 'bad-header'
    list icmp_type 'unknown-header-type'
    option limit '1000/sec'
    option family 'ipv6'
    option target 'ACCEPT'

config include
    option path '/etc/firewall.user'

config rule
    option src 'wan'
    option dest 'lan'
    option proto 'esp'
    option target 'ACCEPT'

config rule
    option src 'wan'
    option dest 'lan'
    option dest_port '500'
    option proto 'udp'
    option target 'ACCEPT'

config zone
    option name 'vpn'
    option output 'ACCEPT'
    option network 'vpn'
    option masq '1'
    option input 'REJECT'
    option forward 'REJECT'

config rule
    option target 'ACCEPT'
    option src 'lan'
    option dest 'vpn'
    option name 'VPN'
    option family 'ipv4'

Check Packet Route

After the router boots up, one can validate if traffic indeed travels through the PPtP tunnel by,
  • traceroute command from your computer once connected to the MR3020
  • In the LuCi interface under Status/Route
  • In the LuCi interface under Network/Diagnostic/Traceroute
If the configuration was successful the packets should take a route similar to the following:
10.*.*.* ==> 192.168.1.2 ==> 192.168.1.1 ==> ISP and DNS servers

Troubleshooting

Failsafe mode

Referring to the hardware specific Failsafe instuctions on the OpenWRT Wiki the process is the following:
  1. Turn off your MR3020
  2. Set your computer's ethernet IP address to 192.168.1.2 (static). In Ubuntu go to Network connections/Wired/Wired (or Cable, depending how it is named) and click Edit.
    Network connections in Ubuntu.
    Setting a static IP address to the ethernet interface in Ubuntu.Netmask can be 255.255.255.0, gateway 192.168.1.1
  3. Disconnect your computer from other networks.
  4. Connect your computer to the MR3020 via an ethernet cable.
  5. Power up the MR3020.
  6. When the WPS button starts blinking during boot, press it. It should start blinking faster. The router is now in Failsafe mode.
  7. In a terminal window type,
    telnet 192.168.1.1
    Note: Even if you have previously set a password to enable ssh, in Failsafe mode only telnet works.
  8. To enable editing files type,
    mount_root

Restore to stock OpenWRT

If you have lost track of configurations, sometimes it is easier to simply start over. If you have access to your router via telnet or ssh you can use the following to reset back to factory OpenWRT settings.
  1. Access your router in Failsafe mode and execute the following commands
  2. mount_root
  3. mtd -r erase rootfs_data
    (Your router might reboot automatically after this step, hence making step 4 unnecessary.)
  4. reboot -f

Summary

I hope this has helped you save some time and get your network up and running. If you have any remarks or questions I would be happy to take them. Leave a comment if you are happy about the guide or unsure about something.