Following the success of Bitcoin many different peer-to-peer currencies have appeared on the internet. One of these was Litecoin. And even though it was designed by following the basic principles behind Bitcoin, it has some major differences.
This guide will show a likeliness to
Bitcoin Basics and Ubuntu 12.04 simply because the similarities in the client and mining software and the currency in general.
Contents of this Article:
- About Litecoin
- Installing the Litecoin Client
- Mining Software
- Mining Hardware Comparison
- Installing the Mining Software
- Where to Mine
- Sources
About Litecoin

"Litecoin provides faster confirmations (targeted at every 2.5 minutes on average) and uses memory-hard, scrypt-based mining to target the CPUs and GPUs most people already have." [1]
Generating new currency is done by investing computing power, hashing. The computer solves a puzzle and when it finds a block a reward is issued. he block reward is currently still 50 Litecoins (LTC), halving every ~4 years. The exchange rate at the time of writing this article, 1 LTC was worth ~ $1.5.
Litecoin network uses the
scrypt algorithm that was specially designed to take longer time to compute, hence hashing rates are lower than in the Bitcoin network. However, since a new block is generated - on average - every 2.5 minutes (compared to 10 minutes in the Bitcoin), there will be 4 times as much coins in existence, summing in 84 million.
Another aim for Litecoin was to avoid concurrence to Bitcoin. While FPGAs and ASICs are providing the majority of the Bitcoin network's hashing power, these are not usable for Litecoin mining (or at least not yet). Litecoin mining is economically viable on available, consumer hardware. As the global hashing rate is slower, there will be no handful of individuals "dominating" the network with extremely powerful devices (to be seen in the future). However, there is still concurrence, as if one has a GPU, a decision has to be made whether to mine BTC or LTC.
Installing the Litecoin Client
Installing the client is simple and it can be done either from the terminal or through GUI/Nautilus.
It has to be noted that Litecoin has also 2 client versions, litecoind and litecoin-qt. Litecoind is the "litecoin daemon, a terminal version, whereas litecoin-qt is the qt4, GUI version of the client software. Unless you know what you are doing, it is recommended to use the GUI version of the client, litecoin-qt.
Before Installation
Package dependencies have to be satisfied. Run the following command to install necessary packages,
sudo apt-get install libqtgui4
If you have the Bitcoin client installed, you probably already have all packages.
GUI
- Download the latest client software
- Unpack the downloaded file to anywhere on your computer
- Navigate to the unpacked directory/bin/##
- Launch the executable file "litecoin-qt"
Where ## is either 32 or 64 depending on what system you have (32 or 64 bit).
This will launch the Litecoin client.
Terminal
Run the following commands in a terminal window to install the client,
- wget https://github.com/downloads/litecoin-project/litecoin/litecoin-0.6.3c-linux.tar.gz
- tar xzvf litecoin-0.6.3c-linux.tar.gz
- cd litecoin-0.6.3c-linux/##
- ./litecoin-qt
Where ## is either 32 or 64 depending on what system you have (32 or 64 bit).
This will launch the Litecoin client.
After running the executable file, a directory ".litecoin" will be created in your home directory.
/Home/$USER/.litecoin contains your blockchain and wallet.dat file. (You can press Ctrl+H to view hidden files)
The Litecoin client is nicely integrated into the Ubuntu menu bar, originally an issue with older Bitcoin clients.
Mining Software
The generation of new blocks is done by "mining" that is the investing of computational power. As the Litecoin was designed to be unfavourable for specific mining hardware (FPGA & ASIC), mining is currently only done using CPUs, but mainly GPUs.
There are back end software, actually doing the mining and there is a GUI front end, that allows quick and easy configuration.
The 3 software for Litecoin mining currently available are,
- cgminer --scrypt
- reaper miner
- pooler cpumineer
GUIminer -scrypt serves as a front end and has reaper miner, cgminer and even stratum built in! Hence is a truly useful tool for beginners.
Cgminer is the same miner that is used for mining Bitcoins, but with the argument "--scrypt" it can be used for mining Litecoins. Uses GPU and requires AMD APP SDK on ATI/AMD cards to be installed. Cgminer comes with stratum proxy included, hence it can be used to mine through both getwork and stratum.
Reaper miner is an OpenCL miner for both nVidia and ATI/AMD GPUs, however it is more efficient on ATI cards. If pool requires stratum, stratum proxy has to be running.
Pooler cpuminer (or "minerd" ) is a miner for CPUs that was integrated into the Litecoin-qt client as well. If pool requires stratum, stratum proxy has to be running.
Stratum Mining Protocol (or Stratum Proxy) is a protocol written by slush originally for Bitcoin mining to improve pool-miner communications. This protocol was adopted by a range of other pools and by many of the Litecoin pools as well.
Mining Hardware Comparison
Of course there are differences in hardware hashing powers. Due to the architecture of ATI/AMD and nVidia graphics cards, ATI/AMD cards perform better here as well.
And while one would get 200MH/s+ from a decent GPU in the Bitcoin network, using the scrypt algorithm and mining Litecoin, this value is in the range of a few hundred kH/s.
CPUs only do a few 10kH/s and hence are (once again) ineffective and probably economically not viable for mining purposes.
Installing the Mining Software
GUIminer -scrypt
The installation procedure is the same as in the case of GUIminer for Bitcoin. Please refer to
Bitcoin Basics and Ubuntu 12.04
Get the latest release of GUIminer -scrypt from git repository
https://github.com/theRealTacoTime/poclbm
Stratum Proxy
Stratum protocol is using python. If you do not have python-dev installed, run the following command,
sudo apt-get install python-dev
Download the tarball from https://github.com/slush0/stratum-mining-proxy/tarball/master
Extract it
Open up a terminal window (Ctrl+Alt+T) and navigate to the newly created directory and run the command to install,
sudo python setup.py install
When installation is finished, you may start the proxy with
./mining_proxy.py
However, as stratum tries to connect to slush's Bitcoin mining pool by default, extra arguments need to be used.
./mining_proxy.py -o coinotron.com -p 3334
Would connect to coinotron.com pool on port number 3334. For a list of arguments that can be used, type
./mining_proxy.py --help
Note: If you are getting an error during install, it is likely that you don't have the necessary python-dev installed.
Also, all this can be done form a terminal window as well,
wget https://github.com/slush0/stratum-mining-proxy/tarball/master
tar xf slush0-stratum-mining-proxy-7b5c080.tar.gz
cd slush0-stratum-mining-proxy-7b5c080/sudo apt-get install python-dev
sudo python setup.py install
./mining_proxy.py -o coinotron.com -p 3334
Pooler cpuminer
Download latest
source tarball from
https://github.com/pooler/cpuminer/downloads
(I had problems when trying to clone git repository, so use the above link)
Extract it to anywhere on your computer
Open a new terminal window and navigate to the newly created directory and compile from source
./configure
make
After making it the executable file minerd will be created in the directory. You can start using miner (pooler cpuminer) to mine right away. Using the credentials from your pool. Remember, if your pool only uses stratum for mining, you have to have stratum running.
In this case you have to connect to,
host: localhost (or 127.0.0.1)
port: 8332
Watch out whether or not you have to use stratum and your pool's login credentials. Once again, installation can e done purely from the terminal as well,
wget https://github.com/downloads/pooler/cpuminer/pooler-cpuminer-2.2.3.tar.gz
tar xzvf pooler-cpuminer-2.2.3.tar.gz
cd pooler-cpuminer-2.2.3
./configure && make
./minerd -o URL:PORT -u USER - p PASSWORD
Important that minerd can be used through the libcoin-qt as well. To do this copy the minerd executable file into the folder where libcoin-qt is. After this you can start CPU mining directly from your client software! Credentials still have to be provided of course.
Pooler cpuminer is similar to cgminer and uses the same syntax. When launching from the terminal you can use the following arguments,
- -o URL of your pool
- -u workername
- -p woerkerpass
So when stratum proxy is running and connected to a pool, it can be run as
./minerd -o localhost:8332 -u USER -p PASSWORD
As with any miners, to get some help,
./minerd --help
Cgminer
Unfortunately, as my laptop is rather old, it doesn't have a good enough video card to support any type of mining. However, the installation process is the following.
Cgminer has to be started with the argument "--scrypt" in order to start mining Litecoins with the scrypt algorithm. If you have cgminer on your system and can mine Bitcoins, there is nothing more to do. A sample setup would look like,
cgminer --scrypt -o stratum+tcp://coinotron.com:3334 -u workername -p workerpass
Where
- -o URL of your pool
- -u workername
- -p woerkerpass
Reaper Miner
Extract the archive
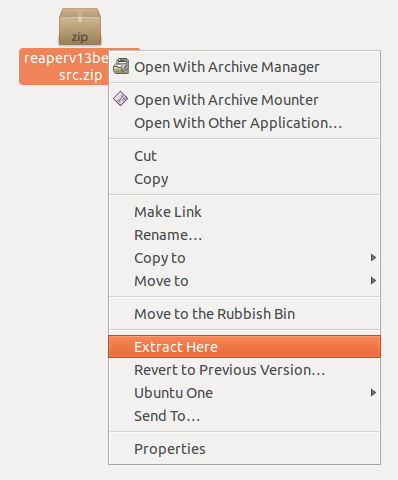
Open a terminal window and navigate to the directory and issue the following commands,
mkdir build
cd build
cmake -D CMAKE_BUILD_TYPE=Release ..
make
You need the 2 dots [..] at the end!
After this the reaper binary, executable file will be generated. You can run it as
./reaper
If you want to, you can move this executable to any other folder, but also move the files,
- reaper.cl
- reaper.conf
- litecoin.conf
As these are used by the miner and have to be in the same directory.
Reaper miner uses config files for mining, in this case 2 config files are of interest, namely reaper.conf and litecoin.conf.
First open reaper.conf with any text editor and remove the lines
mine solidcoin
mine bitcoin
from the end of the file. It should look like this,
Then open litecoin.conf (DO NOT mix this up with home/$USER/.litecoin/litecoin.conf as the two are NOT the same !) and fill out the
- host localhost
- port 8332
- user username
- pass password
with the proper credentials for your pool. Note that there will be a difference when mining through stratum proxy. The config file should look similar,
After these configurations have been made, make sure that the reaper executable file is in the same directory as the config files. Run reaper with
./reaper
If you have managed to start reaper miner, you can start experimenting with the configuration files to get better hashing speeds.
Note that reaper miner also uses OpenCL, hence make sure you have the necessary
AMD APP SDK installed.
Where to Mine
Just like with Bitcoin, there are two options for mining: solo and pooled mining.
Solo mining is when you are running the client in server mode and connect to it with your mining software. If you find a block, the whole 50LTC reward goes to you (~70$ currently). If, however, you do not find a block, there is no reward. This is a high risk high gain mining technique and it is not advised unless you have considerable hashing power.
Pooled mining is when a group of miners unite and mine as a team. Shares are given to each miner based on the amount of work (hashes solved) and when a block is found by any of the miners, the block reward is split among the miners, based on the amount of shares received. This allows a steadier, but smaller amount of payments and hence reduces the risk of never finding a block and never receiving anything.
Configure Solo Mining
Solo mining requires to start the client software in server mode, have proper configuration and connect the mining software to the running client.
1. Firstly a litecoin.conf file has to be created in
/Home/$USER/.litecoin
This file has to contain the following lines:
rpcuser=username
rpcpassword=password
rpcallowip=127.0.0.1
rpcport=9332
daemon=1
server=1
gen=0
Make sure you change
username and
password to something unique.
2. Kill the running
litecoind or
litecoin-qt if any of them are running. You can do this by right-clicking it in the top bar and choose "exit" or
sudo killall litecoin-qt.
3. The client has to be launched in server mode in order for you to connect to it and mine in solo mode. To do this navigate to the unpacked folder and run litecoin-qt with the -server option.
4. Connecting to the server with any mining software is using the credentials given in the litecoin.conf file as created above.
host: 127.0.0.1 (or localhost)
port: 9332
username: your unique username
password: your unique passowrd
Note: You will not see any shares being accepted when mining in solo. If a share is accepted, that means you have found a block. Also if you get a connection error, double-check the credentials to see if you have mistyped something.
Configure Pooled Mining
A list of mining pools is available HERE. After signing up for a pool, you will need some credentials,
- worker name
- worker password
- pool mining address
- port number
Workers are simply put the devices that will mine Litecoins for you. For example if you have 2 GPUs and a decent CPU, you would need to create 3 separate workers.
To connect to the pool, simply substitute the above credentials when connecting with any of the mining software.
Here is a
list of mining pools, compared.
Remember
- Some pools require stratum and do not work over standard http/getwork.
- If you are running stratum, use the host "localhost" or "127.0.0.1" and the port "8332"
- In order to mine with GPUs you have to have either AMD APP SDK for AMD/ATI cards or the CUDA toolkit for nVidia cards. Dont forget about appropriate drivers either. (There are some useful ATI driver links in the blog sidebar)
If you need any help, or something wasn't clear, please leave a comment and I will get back to you and reply as soon as I can.
Happy mining!
(Also, if you have some Litecoins already and want to have some fun, you can check out
litecoinkamikaze.com. Here you can use your Litecoins to make bets, play and maybe even win the jackpot.)
Sources


