Saturday, June 1, 2013

PirateBox Camp 2013, Berlin

Hello everyone!

The PirateBox development team has officially announced today a PirateBox Camp.

Location: Berlin, Germany 
Date: 20th & 21th of July, 2013
Entry: Free for everyone


The event is free to attend and it is going to be fun for al those  who are interested in the project or would like to contribute to it.

Talks will take place explaining the the ideas behind the project project, future development, techniques behind it, a DIY section for building PirateBoxes and much more.

Go check out the details at http://camp.piratebox.de !

Friday, April 12, 2013

Installing Litecoin Client and Mining Software in Ubuntu

Following the success of Bitcoin many different peer-to-peer currencies have appeared on the internet. One of these was Litecoin. And even though it was designed by following the basic principles behind Bitcoin, it has some major differences.

This guide will show a likeliness to Bitcoin Basics and Ubuntu 12.04 simply because the similarities in the client and mining software and the currency in general.

Contents of this Article:

  • About Litecoin
  • Installing the Litecoin Client
  • Mining Software
  • Mining Hardware Comparison
  • Installing the Mining Software
  • Where to Mine
  • Sources


About Litecoin

Litecoin
"Litecoin provides faster confirmations (targeted at every 2.5 minutes on average) and uses memory-hard, scrypt-based mining to target the CPUs and GPUs most people already have." [1]

Generating new currency is done by investing computing power, hashing. The computer solves a puzzle and when it finds a block a reward is issued. he block reward is currently still 50 Litecoins (LTC), halving every ~4 years. The exchange rate at the time of writing this article, 1 LTC was worth ~ $1.5.

Litecoin network uses the scrypt algorithm that was specially designed to take longer time to compute, hence hashing rates are lower than in the Bitcoin network. However, since a new block is generated - on average - every 2.5 minutes (compared to 10 minutes in the Bitcoin), there will be 4 times as much coins in existence, summing in 84 million.

Another aim for Litecoin was to avoid concurrence to Bitcoin. While FPGAs and ASICs are providing the majority of the Bitcoin network's hashing power, these are not usable for Litecoin mining (or at least not yet). Litecoin mining is economically viable on available, consumer hardware. As the global hashing rate is slower, there will be no handful of individuals "dominating" the network with extremely powerful devices (to be seen in the future). However, there is still concurrence, as if one has a GPU, a decision has to be made whether to mine BTC or LTC.

Installing the Litecoin Client


Installing the client is simple and it can be done either  from the terminal or through GUI/Nautilus.

It has to be noted that Litecoin has also 2 client versions, litecoind and litecoin-qt. Litecoind is the "litecoin daemon, a terminal version, whereas litecoin-qt is the qt4, GUI version of the client software. Unless you know what you are doing, it is recommended to use the GUI version of the client, litecoin-qt.

Before Installation

Package dependencies have to be satisfied. Run the following command to install necessary packages,

sudo apt-get install libqtgui4
If you have the Bitcoin client installed, you probably already have all packages.

GUI
  • Download the latest client software
  • Unpack the downloaded file to anywhere on your computer
  • Navigate to the unpacked directory/bin/##
  • Launch the executable file "litecoin-qt"

Where ## is either 32 or 64 depending on what system you have (32 or 64 bit).
This will launch the Litecoin client.


Terminal

Run the following commands in a terminal window to install the client,
  • wget https://github.com/downloads/litecoin-project/litecoin/litecoin-0.6.3c-linux.tar.gz
  • tar xzvf litecoin-0.6.3c-linux.tar.gz  
  • cd litecoin-0.6.3c-linux/## 
  • ./litecoin-qt

Where ## is either 32 or 64 depending on what system you have (32 or 64 bit).
This will launch the Litecoin client.


After running the executable file, a directory ".litecoin" will be created in your home directory.
/Home/$USER/.litecoin contains your blockchain and wallet.dat file. (You can press Ctrl+H to view hidden files)


The Litecoin client is nicely integrated into the Ubuntu menu bar, originally an issue with older Bitcoin clients.


Mining Software


The generation of new blocks is done by "mining" that is the investing of computational power. As the Litecoin was designed to be unfavourable for specific mining hardware (FPGA & ASIC), mining is currently only done using CPUs, but mainly GPUs.

There are back end software, actually doing the mining and there is a GUI front end, that allows quick and easy configuration.
The 3 software for Litecoin mining currently available are,
  1. cgminer --scrypt
  2. reaper miner
  3. pooler cpumineer

GUIminer -scrypt  serves as a front end and has reaper miner, cgminer and even stratum built in! Hence is a truly useful tool for beginners.

Cgminer is the same miner that is used for mining Bitcoins, but with the argument "--scrypt" it can be used for mining Litecoins. Uses GPU and requires AMD APP SDK on ATI/AMD cards to be installed. Cgminer comes with stratum proxy included, hence it can be used to mine through both getwork and stratum.

Reaper miner is an OpenCL miner for both nVidia and ATI/AMD GPUs, however it is more efficient on ATI cards. If pool requires stratum, stratum proxy has to be running.

Pooler cpuminer (or "minerd" ) is a miner for CPUs that was integrated into the Litecoin-qt client as well. If pool requires stratum, stratum proxy has to be running.


Stratum Mining Protocol (or Stratum Proxy) is a protocol written by slush originally for Bitcoin mining to improve pool-miner communications. This protocol was adopted by a range of other pools and by many of the Litecoin pools as well.


Mining Hardware Comparison


Of course there are differences in hardware hashing powers. Due to the architecture of ATI/AMD and nVidia graphics cards, ATI/AMD cards perform better here as well.
And while one would get 200MH/s+ from a decent GPU in the Bitcoin network, using the scrypt algorithm and mining Litecoin, this value is in the range of a few hundred kH/s.
CPUs only do a few 10kH/s and hence are (once again) ineffective and probably economically not viable for mining purposes.


Installing the Mining Software


GUIminer -scrypt


The installation procedure is the same as in the case of GUIminer for Bitcoin. Please refer to Bitcoin Basics and Ubuntu 12.04

Get the latest release of GUIminer -scrypt from git repository https://github.com/theRealTacoTime/poclbm

Stratum Proxy


Stratum protocol is using python. If you do not have python-dev installed, run the following command,
sudo apt-get install python-dev

Download the tarball from https://github.com/slush0/stratum-mining-proxy/tarball/master

Extract it

Open up a terminal window (Ctrl+Alt+T) and navigate to the newly created directory and run the command to install,
sudo python setup.py install

When installation is finished, you may start the proxy with
./mining_proxy.py
However, as stratum tries to connect to slush's Bitcoin mining pool by default, extra arguments need to be used.
./mining_proxy.py -o coinotron.com -p 3334
Would connect to coinotron.com pool on port number 3334. For a list of arguments that can be used, type
./mining_proxy.py --help


Note: If you are getting an error during install, it is likely that you don't have the necessary python-dev installed.
Also, all this can be done form a terminal window as well,
wget https://github.com/slush0/stratum-mining-proxy/tarball/master
tar xf slush0-stratum-mining-proxy-7b5c080.tar.gz
cd slush0-stratum-mining-proxy-7b5c080/sudo apt-get install python-dev
sudo python setup.py install

./mining_proxy.py -o coinotron.com -p 3334


Pooler cpuminer


Download latest source tarball from https://github.com/pooler/cpuminer/downloads
(I had problems when trying to clone git repository, so use the above link)


Extract it to anywhere on your computer


Open a new terminal window and navigate to the newly created directory and compile from source
./configure
make

After making it the executable file minerd will be created in the directory. You can start using miner (pooler cpuminer) to mine right away. Using the credentials from your pool. Remember, if your pool only uses stratum for mining, you have to have stratum running.

In this case you have to connect to,
host: localhost (or 127.0.0.1)
port: 8332


Watch out whether or not you have to use stratum and your pool's login credentials. Once again, installation can e done purely from the terminal as well,
wget https://github.com/downloads/pooler/cpuminer/pooler-cpuminer-2.2.3.tar.gz
tar xzvf pooler-cpuminer-2.2.3.tar.gz
cd pooler-cpuminer-2.2.3
./configure && make
./minerd -o URL:PORT -u USER - p PASSWORD

Important that minerd can be used through the libcoin-qt as well. To do this copy the minerd executable file into the folder where libcoin-qt is. After this you can start CPU mining directly from your client software! Credentials still have to be provided of course.


Pooler cpuminer is similar to cgminer and uses the same syntax. When launching from the terminal you can use the following arguments,
  • -o URL of your pool
  • -u workername
  • -p woerkerpass
 So when stratum proxy is running and connected to a pool, it can be run as
./minerd -o localhost:8332 -u USER -p PASSWORD


As with any miners, to get some help,
./minerd --help

Cgminer


Unfortunately, as my laptop is rather old, it doesn't have a good enough video card to support any type of mining. However, the installation process is the following.


Cgminer has to be started with the argument "--scrypt" in order to start mining Litecoins with the scrypt algorithm. If you have cgminer on your system and can mine Bitcoins, there is nothing more to do. A sample setup would look like,

cgminer --scrypt -o stratum+tcp://coinotron.com:3334 -u workername -p workerpass

Where
  • -o URL of your pool
  • -u workername
  • -p woerkerpass


Reaper Miner


Extract the archive
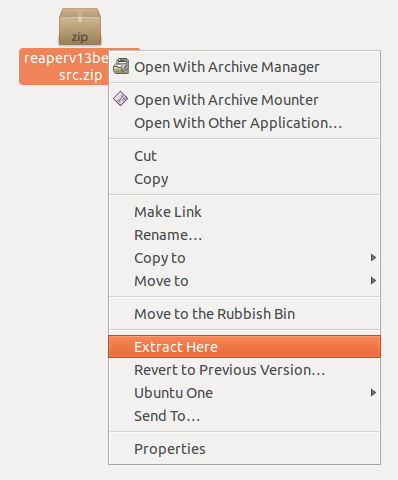
Open a terminal window and navigate to the directory and issue the following commands,

mkdir build
cd build

cmake -D CMAKE_BUILD_TYPE=Release ..
make
You need the 2 dots [..] at the end!
After this the reaper binary, executable file will be generated. You can run it as
./reaper
If you want to, you can move this executable to any other folder, but also move the files,
  • reaper.cl
  • reaper.conf
  • litecoin.conf
As these are used by the miner and have to be in the same directory.

Reaper miner uses config files for mining, in this case 2 config files are of interest, namely reaper.conf and litecoin.conf.

First open reaper.conf with any text editor and remove the lines
mine solidcoin
mine bitcoin
from the end of the file. It should look like this,


Then open litecoin.conf (DO NOT mix this up with home/$USER/.litecoin/litecoin.conf as the two are NOT the same !) and fill out the 
  • host localhost 
  • port 8332 
  • user username
  • pass password
with the proper credentials for your pool. Note that there will be a difference when mining through stratum proxy. The config file should look similar,


After these configurations have been made, make sure that the reaper executable file is in the same directory as the config files. Run reaper with
./reaper


If you have managed to start reaper miner, you can start experimenting with the configuration files to get better hashing speeds.

Note that reaper miner also uses OpenCL, hence make sure you have the necessary AMD APP SDK installed.

Where to Mine


Just like with Bitcoin, there are two options for mining: solo and pooled mining.

Solo mining is when you are running the client in server mode and connect to it with your mining software. If you find a block, the whole 50LTC reward goes to you (~70$ currently). If, however, you do not find a block, there is no reward. This is a high risk high gain mining technique and it is not advised unless you have considerable hashing power.

Pooled mining is when a group of miners unite and mine as a team. Shares are given to each miner based on the amount of work (hashes solved) and when a block is found by any of the miners, the block reward is split among the miners, based on the amount of shares received. This allows a steadier, but smaller amount of payments and hence reduces the risk of never finding a block and never receiving anything.

Configure Solo Mining

Solo mining requires to start the client software in server mode, have proper configuration and connect the mining software to the running client.

1. Firstly a litecoin.conf file has to be created in /Home/$USER/.litecoin
This file has to contain the following lines:

rpcuser=username
rpcpassword=password
rpcallowip=127.0.0.1
rpcport=9332
daemon=1
server=1
gen=0
Make sure you change username and password to something unique.

2. Kill the running litecoind or litecoin-qt if any of them are running. You can do this by right-clicking it in the top bar and choose "exit" or sudo killall litecoin-qt.

3. The client has to be launched in server mode in order for you to connect to it and mine in solo mode. To do this navigate to the unpacked folder and run litecoin-qt with the -server option.


4. Connecting to the server with any mining software is using the credentials given in the litecoin.conf file as created above.

host: 127.0.0.1 (or localhost)
port: 9332
username: your unique username
password: your unique passowrd

Note: You will not see any shares being accepted when mining in solo. If a share is accepted, that means you have found a block. Also if you get a connection error, double-check the credentials to see if you have mistyped something.

Configure Pooled Mining


A list of mining pools is available HERE. After signing up for a pool, you will need some credentials,

  • worker name
  • worker password
  • pool mining address
  • port number

Workers are simply put the devices that will mine Litecoins for you. For example if you have 2 GPUs and a decent CPU, you would need to create 3 separate workers.

To connect to the pool, simply substitute the above credentials when connecting with any of the mining software.

Here is a list of mining pools, compared.

Remember

  • Some pools require stratum and do not work over standard http/getwork.
  • If you are running stratum, use the host "localhost" or "127.0.0.1" and the port "8332"
  • In order to mine with GPUs you have to have either AMD APP SDK for AMD/ATI cards or the CUDA toolkit for nVidia cards. Dont forget about appropriate drivers either. (There are some useful ATI driver links in the blog sidebar)
If you need any help, or something wasn't clear, please leave a comment and I will get back to you and reply as soon as I can.
Happy mining!

(Also, if you have some Litecoins already and want to have some fun, you can check out litecoinkamikaze.com. Here you can use your Litecoins to make bets, play and maybe even win the jackpot.)

Sources


Thursday, April 4, 2013

Create Symbolic Links in Ubuntu

The 2 types of links are hard links and soft links .

A hard link is essentially a file with multiple names, there are multiple copies of the file. So that if one of the hard links is deleted, the file persists to exist.

A soft link (also called symlink or symbolic link) is a file system entry that points to the file name and location. Deleting the symbolic link does not remove the original file. If, however, the file to which the soft link points is removed, the soft link stops working, it is broken.

Symbolic links can be created both from the terminal and from nautilus (file manager, GUI). 
 

Terminal


The syntax for creating a symbolic link is,
ln -s target source
where,
  • target - The existing file/directory you would like to link TO.
  • source - The file/folder to be created, copying the contents of the target. The LINK itself.
For more help see ln --help

Example:
ln -s /home/nargren/Pictures /home/nargren/Pictures_Backup
This would create a symbolic link directory called "Pictures_Backup" to my "Pictures" directory. All the content in either of the 2 directories would appear in the other one as well.

GUI


You can easily create a symbolic link to a folder or file by middle clicking on the folder with the mouse and dragging it to its new location, while holding the middle mouse button.

Remove Symbolic Links


To remove a symbolic link, be it a file or directory, simply remove the created link. This can be done either through nautilus (GUI) or using the rm and rm -f commands in the terminal.

Use of Symbolic Links


Symbolic links are especially useful on computers with dual-boot, running for example Windows and Linux. As symbolic links can be created across partitions and file systems, windows folders can be linked to appropriate Ubuntu folders.

I will bring my own example of using Mozilla Thunderbird as e-mail client. I would like to have my emails and profiles available, including all my downloaded emails on both operating systems. This could be done either by downloading all new e-mails when I start the software on any of the two operating systems, or via symbolic links. As I had problems downloading new emails with multiple clients, I have chosen to make a symbolic link.

I have linked my Windows
[USER]\AppData\Roaming\Thunderbird
 folder to the Ubuntu directory
 home/.thunderbird
This allowed me to download my emails only once and have them available on both Windows and Linux while keeping my entire profile.

Tuesday, February 19, 2013

Ubuntu tablet

Earlier today Ubuntu tablet was announced. 


The brief promo video shows how fast the OS works on a tablet computer. Seamless change between applications and stunning multi task experience. Head over to Ubuntu.com to learn more!

The user interface looks mostly identical to that of the Ubuntu phone, hence the "unity", uniformity across devices. The same simple and fast interface on a larger screen allowing you to use both hands or watch videos, view and edit images or video chat with friends. Very nice first impression with the extremely fast and responsive system. I have used android tablets before, but this seems like a new user experience. I like the layout, the controls and the full utilization of the screen.

Just like in the case of the Ubuntu phone, I really hope that the tablet can run a terminal as well.

To learn more about functions and features read my post about the Ubuntu Phone and watch the video above. Don't forget to check out Ubuntu.com either!

Wednesday, January 23, 2013

Ubuntu Phone

If you are fan of Linux and Ubuntu just like I am, then there is some good news. Canonical is expanding the world's favorite linux-based operating system to smartphones, hence Ubuntu phone.


Watch the industry proposition with Mark Shuttleworth (founder of Canonical), talking about the latest achivements and introducing Ubuntu phone.


And a little hands-on review at CES2013 with Engadget, see Ubuntu in action.


Mobile Operating Systems

For the past years Android and iOS have been competing with each other and the users didn't have much a choice, it was either or (unfortunately RIM's BlackBerry OS is declining, although it is a very nice platform, and Symbian is almost totally disappeared). It is no secret that back in the day when the first iPhone came out it was aimed at the everyday customers who needed ease of use above all. Then came Android, the open-source system that has filled in the gap created by the very restricted iPhone and has experienced exponential growth and is still expanding. Both systems are user-friendly and preference over one or the other is purely a personal matter.
Then came Windows phone that has brought competition into the battle between the two major systems. It has received positive reviews and indeed is a very nice platform that is responsive and easy to use.
Canonical's Ubuntu however, will surely be a game changer and bring another refreshment in the field. They have taken their time and learned through the years to finally come up with a brilliant system, that is different from what we have seen so far from any mobile operating systems.
For those who have used Ubuntu before, many features will look familiar like the Unity interface, but those who are new to the operating system should not worry either as it is a very clean and pleasant user experience.


Use 100% Of Your Screen

On a desktop machine place (in terms of display) is not an issue - especially in Linux where you can have multiple virtual desktops providing almost unlimited space for a range of programs - on a phone however it is crucial. Screen size is limited to a few inches and although Android tries to utilize this place - similarly to Linux - with multiple home pages, the menu elements and application features are often taking away a large percent of the already small available place. Ubuntu will bring a huge change in this field as all 4 edges of the screen will have different tasks assigned to them and also offers to hide the menu by default and show it only when necessary.
Use the full capacity of the screen, open menus only when needed (Ubuntu.com)

A touch on the left edge of the screen will show the most recently used applications that allows to quickly launch what you need. No more going to home screen, scrolling through apps until you find what you need, no. It is just 1 touch away. Alternatively if you make a faster swipe from the left you will be presented to the home page where your currently running applications are show along with the installed as well as downloadable applications. Everything in one place, to let you use what you need and not look for it.

The top of the screen holds the different status icons like signal, battery life, messages and volume which is common on the smartphone operating systems. However Ubuntu allows you to directly access these by simply touching them and pulling the menu down. No mater what are you doing on your phone, these settings are available any time without interrupting you. Messages are the same. All messages are accessible from the top of the display while using any other application. Without the need to close or change the application or go back to the menu and look for the messages.
Touching the bottom of the screen brings you up the applications menu. This is similar to Android systems, but by default this menu is hidden to allow you utilizing 100% of your phone's screen. It is not necessary to sacrifice 10-20% of your screen when you are scanning through photos. Touch the bottom of the screen and you can edit or share the picture on your favorite social media site with just one click.

Multitasking has always been a core part of Ubuntu (see multiple virtual desktops) and this is not changing in the Ubuntu phone either. Swiping from the right side of the screen brings you back to the previous application you were using.


Applications

Applications or "Apps" are usually reachable through some sort of Application Store. Now for a long time Ubuntu Desktop has had this feature, providing an enormous amount of software available in their Software Centre. The same which will be available on the Ubuntu phone! Whats more, since this is a truly open source platform, anybody can contribute to this store and develop applications. In fact there is already a software package published by Canonical for this purpose at ubuntu.com. I am sure that the open source community will prove itself and cause an explosive growth of applications for the Ubuntu phone even before actual devices start shipping. I see a huge potential in the Software Centre and I believe that over time this will grow to be one of the dominant advantages over other mobile operating systems. 


Availability

Although there are some working models already, unfortunately we have to wait until the end of this year or possibly until early next year to see Ubuntu phones showing up on the phone market. However there will be Ubuntu phone packages available to download before this time to allow Ubuntu fans to re-flash their Android phones to their favorite operating system. 


Supported Phones

Canonical was at CES 2013 and is still in the process of consulting with manufacturers to ship their phones preloaded with Ubuntu. It is a new platform so it might be risky, but it also has huge benefits. At CES 2013 Ubuntu was shown smoothly running on a Samsung Galaxy Nexus, but it is said that it will be compatible with most Android devices. This means that even if the phone comes originally with Android, it can be re-flashed later on to Ubuntu. This versatility opens up a huge market where Canonical can spread their new operating system, not talking about all those who will replace their Android systems as soon as the Ubuntu package will be available.


One Device To Replace Them All

The idea behind the uniformity across Ubuntu devices (Desktop, TV, tablet and now the phone) is that sooner or later one device could replace the others. 20 years ago there were mostly only robust desktop computers, later these were replaced by lightweight, portable notebooks and in the recent years the smartphone industry has seen an explosive success. As smartphones are getting faster and stronger with better processors and video cards in them, more onboard memory and storage, they indeed are computers already. So what is stopping anyone from taking an Ubuntu phone, docking it at home, connecting a wireless mouse and keybord along with a screen and use it as a regular desktop? This could be done already and this surely is the future. There will come a point where it will be unnecessary (or pointless) to buy separate computers for home use, the smartphones will be powerful enough to replace them.
Dock your powerful Ubuntu phone to turn it into your Desktop  (Ubuntu.com)


Summary

All I can say that I am very much looking forward to this new smartphone operating system and I am sure there are many others who feel the same way. All the awesome features of Ubuntu, the security of Linux squezzed into my handheld computer.
The phone is targeted at the average user and the aim was to make a clean design and an easy to use interface. However, what I personally would like to see are all the functionality of my Ubuntu desktop in the phone. I would like to be able to access the terminal for example, the file system of my phone, be able to install packages just like I am doing now with apt-get and so on. I do not see why these function should not be available, in fact I am almost certain that this open source platform will provide full access to phone features so that it can then be truly used as computers and not as smartphones.

Update: Ubuntu phone will come with a Terminal application!

Learn more at www.ubuntu.com

Tuesday, December 25, 2012

Wi-Fi Boosting: Hardware Trick

Increase your Wi-Fi router's range towards your computer and filter out unwanted Wi-Fi signal from neighbouring devices with some hardware trick. You already have the materials in your house and it takes less than 5 minutes.

A little theory 


Just the bare minimum to understand how and why it works.

Wi-Fi is an unlicensed radio band in the 2.4 GHz range and it behaves just like any other electromagnetic wave. It is known that electromagnetic waves are piercing through metal object very weakly, or in other words they are reflected or stopped. This is the exact same reason why you shouldn't put any metallic object in your microwave oven either.

Electromagnetic waves propagate in the direction without any obstruction freely, but waves that hit metallic surfaces (say a steel plate) get reflected (a portion pierces through and the remainder gets reflected. The ratio of reflected to continuing waves depends on the type and thickness of metallic layer). The reflected component then is heading the same way as the part which was going unobstructed, thereby creating an amplification effect. This amplification can be used in the case if Wi-Fi signal as well, just like described above.

Consider the following example.

Imagine a 2 dimensional system with point signal source (say a router, broadcasting Wi-Fi signal) and a metallic object (radiator) on its right. Considering only the horizontally propagating waves in the 2-dimensional plane, the following happens.

 The signal is emitted and propagates freely to the left as there is no obstruction.

The other part of the signal propagates to the right and hits the surface of the metal plate. At this point (ignoring any signal getting through, so assume 100% reflection) the signal is reflected from the surface and starts heading backwards, the way it started from (dashed lines) .


The reflected waves are now heading in the same direction as the first part (to the left), but now there are twice as much, going in the one direction, hence the stronger or more signal.

How to make use of this 


The reflection of signals is usually an unwanted thing in an apartment where Wi-Fi is used as it generally weakens the signal. This occurs when a router is placed close to a radiator or mirror and the computer is on the other side respectively. However when placing the signal source cleverly,  reflection can be taken advantage of and it can actually boost the radio signal. 2 main tricks that can be done are
  1. Amplifying the signal coming from the router to a specific direction
  2. Blocking signal arriving to a device
The first one is the process described above in the theory whereas a signal is forced in a chosen direction. The latter option might not seem useful for the fist time, but it is actually very handy in situations where there are a lot of different signals. In these cases (say 20 different Wi-Fi routers) each of the 13 channels are used, some even by more than 2-3 devices. If this happens, the receiver device has to differentiate between the incoming signals and decide which one is the one required and filter out the rest. Referring to the used example, if an antenna is receiving a signal from the left, then by placing a metallic object on its right, the unwanted signals coming from the right can be blocked out, hence the receiving device will have to "think" less about which signal is useful and which one should be disregarded.

Make your own amplifier


Making something that amplifies or rather said direct your Wi-Fi signal into the necessary direction is way easier than it sounds. All you need is:
  • Cardboard
  • Aluminium foil
  • Scissors, duct tape etc.
Ultimately what you need to do is to cut a piece of cardboard and cover it with aluminium foil. This will act as the metallic layer as described in the previous example and reflect your signal the way you need it to.


Then, based on how you want to direct the signal place it behind your signal source. You can either have it
  • Straight - the signal will be stronger on the one side of the wall while weaker on the other side
  • Bent in a slight "U" shape or parabola - the signal will be directed more or less in a cone shape. This is a more focused option and can extend the range further out in a narrower region.

Results


This does sound cheap and it is, but it certainly does the job. I have applied this behind my receiver antenna and it has blocked out about 9 out of 12 Wi-Fi signals from neighbours and therefore made my own signal reception much more stable and reliable. I am just making another one to place behind the router and direct more signal towards my antenna, which is going to even further improve the quality of my local network.

Please note that even though this is a nice trick you can do fast within the next 5 minutes and get significant results immediately after placing it, it will not be as good as buying directional antennas or anything similar.

My plans are to test a parabola antenna by placing a small router in the middle of it and check how far the range has extended. I have seen Wi-Fi working over vast distances and I am hoping for reproducing similar results.

    Thursday, December 20, 2012

    PirateBox: Design 2.0 Update

    First of all a huge thanks to Maxime who has made some really nice improvements to my design that I am discussing here. It is about the "Design 2.0" and see the list of improvements below.

    The improvements and changes do not require any change to your PirateBox, except for the www folder where the html files are stored, the pbIMG_ws.img file on your drive.

    Improvements

    • User gets automatically redirected to mobile version of the website if accessing from mobile device (presuming no preference is set on the device for viewing the browser versions). 
    • Display the number of connected users, just to keep track on how many users are connected to the PirateBox.
      (Fundamental part of a PirateBox is that it is fully anonymous and this does not change here. No information is collected from the users, the device only tells the total number of connections, nothing else.)
    • There is a very nicely written tutorial for replacing the original PirateBox design with my Design, including instructions how to modify the page for your liking.
    • Also the chat was changed slightly. It is no longer operating as an iframe, but as a core part of the index (home) page. As a result of this it will load faster and it will eliminate compatibility issues with some devices. Also since it is now the part of the main page, there is no need for a chat.html page either.

    Changing to my Design


    Download: GitHub

    There is a tutorial written by Maxime on GitHub that you can follow, but it is as simple as downloading the "Design 2.0" folder and copying over its contents to the Pendrive's pbIMG_ws.img/piratebox/www folder, overwriting any similar files already there.
    Attention: Make sure you do a BACKUP of your own www folder and it's contents before overwriting files or doing any changes.

    Screenshots


    So that you do not have to go back to previous post to know what design I am talking about.


    As you can see nothing has changed in the overall design, the pictures just show how the design looks to have a quick idea of what you get here. The change in chat is not remarkable to the naked eye, but it is a nice new feature that it doesn't need to be loaded and embedded from a separate page, but being part of the main page.
    I also cannot show the mobile redirect, but that is one of the nice features I really like. So from now on even people from mobile devices can get a basic view of the site, however if they prefer they can sure view the browser version.

    Future Plans


    After talking to Maxime we have started to work together to give a better finish to the UI, add more functionality and improve general appearance and usability.
    Our plans for the future are to add the following:
    • Admin page with the features
      • Allow editing (rename, delete etc.) of uploaded files
      • Contain a short guide of terminal commands with the most important commands
    • Option for owners to add video, music or possible games to the PirateBox that can be streamed to the users. It is likely that only "stronger" PirateBoxes will have this function as this will need larger amount of computing power from the router. (However as browser try opening files instead of downloading them anyway, this sort of works already.)
    • Multiple languages support for the site so users could choose to view & use the PirateBox in their own, preferred language.
    • Design adjustments to achieve a higher standard and make a more attractive UI in general for the public.
    Videos, music and even flash games can be added easily by anyone right now as well. As HTML5 supports a videos and music, this can also be added relatively easily, see the example below for adding a video:

        <article id="video">
        <h1>Copy Is Not Theft!</h1>
        <h2>A short video illustrating the difference between stealing and       copying.</h2>
        <video id="intro_vid" width="600" height="450" controls >
        <source src="multimedia/Copying.Is.Not.Theft.webm" />
        <source src="multimedia/Copying.Is.Not.Theft.mp4" />
        </video>
        </article>

    The above code would add a new article (section) to the man page where video(s) would be at multimedia/video.webNow you can see 2 video formats listed there, this is needed because in HTML 5 different browsers support different video types.

    Similarly, you could add audio files to your site as well, example:

        <audio controls="controls">
        <source src="multimedia/audio.ogg" type="audio/ogg">
        <source src="multimedia/audio.mp3" type="audio/mpeg">
        Your browser does not support the audio element, soz.
        </audio>

    Where again the 2 file types are because of browser supports.
    Although note that the standard pbIMG_ws.img container is only 20MB in size and all the files for the website must be in here. Now you can of course make a larger img file that could contain all the files and added videos, but this will take up space on the pendrive. Also the more multimedia you add, the more your box will have to work.

    On my custom box I am using a 50MB container with just one short video and audio file for experimental purposes, it looks like this:

    As you can see, I also made myself a "Video" and "Games" tab as well, the picture above shows the video page, but there is a flash game uploaded as well. It is running just fine, but not multiplayer.